Atlas Map Markers – Updated with MCM
This is an update to Kronixx’s great mod, Atlas Map Markers. It adds MCM options with full control over not only the new map markers, but all of the vanilla map markers as well. All credit for the original mod belongs to Kronixx. I just added the MCM and made a couple of changes.
NEW FEATURES
Adds a Mod Configuration Menu.
Quickly and easily edit which map markers are visible on your map.
Vanilla map markers can now be fully configured as well.
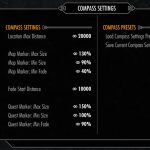
Options to adjust Compass settings (values are set to vanilla by default).
Includes FISS support, allowing you to save your settings as custom presets.
Minor fixes and updates to some of the map markers.
Compatibility for the Unofficial Patch is handled automatically.
REQUIREMENTS
– Dawnguard, Hearthfire, and Dragonborn (this update only supports Atlas Legendary, so you will need all three DLCs)
– The original Atlas Map Markers (for script and swf files)
– SkyUI
INSTALLATION
First download the installer
Follow the instructions to install the Legendary version of Atlas Map Markers.
Download and install the updated file found on this page, allowing it to overwrite Atlas Legendary.esp from the original mod.
CHANGES
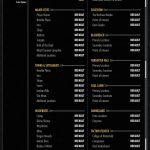
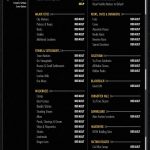
The primary change made by this update is the addition of a Mod Configuration Menu. The MCM will allow you to select which map markers you wish to have active. Most of the map markers are enabled by default, but any and all of them can be disabled. Even the primary locations that could not be toggled in the original Atlas menu can now be configured.
The MCM is set up to work a bit differently than the old book menus. You can’t use the MCM to configure individual map markers, but the markers are now divided into more groups, which will hopefully provide for a quicker and more convenient setup. In addition, I have included options to allow you to configure nearly every vanilla map marker as well, so you can fully customize the map with just the markers you want and need.
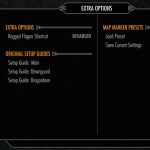
The old setup books that were found in the Riverwood Trader have been removed from the game. However, if you still wish to have access to the old setup menus in order to configure individual markers, you can get the books via the MCM and proceed as usual from there. Due to the added complexity of creating toggles for them, I have decided to leave the Treasure Map loot markers and Dawnguard Cache markers off the MCM menu. They can still be configured through the Setup Guides.
Please keep in mind that the process by which Skyrim updates the map is not exactly the fastest function in the game. The map will wait to update until after you exit out of the MCM, and it may take several minutes to complete. This is particularly true if you have edited the settings for a number of the categories and the script has to process a lot of map markers. You can carry on playing while the map updates, but you can’t access the Atlas MCM again until it is finished.
I also made a number of minor corrections and bug fixes to both the vanilla map markers and the Atlas markers. These changes mostly consisted of changing the icon used by the map marker so that it was more consistent with the type of location it was representing. A full list of these edits can be found in the Readme file.
Ice caves now use the previously unused “ice cave” icon for a bit of added variation.
The Imperial Fort icon (tower with flag) is now used to represent forts that are occupied (or could potentially become occupied) by friendly or ‘legal’ factions. This includes bandit-controlled forts that can eventually be taken over by Imperial or Stormcloak soldiers, as well as forts controlled by legally sanctioned groups like the Thalmor or Morag Tong.
USING PRESETS
In order to use the preset options, you will need to download and install FileAccess Interface for Skyrim Script (FISS). Once you have FISS installed, you will be able to save and load your settings as custom presets, allowing you to quickly and easily re-configure the menu with your preferred settings.
There are two preset options available: the Compass Settings and the Map Marker settings. The Compass preset will save only the compass settings. The main preset, found under “Extra Options” will save all settings except the compass settings.
I’ve included my own personal presets as the default presets. To use these presets, simply load them prior to saving your own custom preset. Any time you save a new preset, it will overwrite the previous one, so you may wish to make backups of any custom presets you create.
My map marker preset is designed to reduce map marker congestion by disabling most of the map markers added to the major cities, some of the town locations, and the POI markers.
My compass settings are adjusted to reduce clutter on the compass bar. These settings reduce the size of the markers and the distance required for them to appear on the compass, and they also disappear from the compass much more quickly as you move away from them.
If you like the settings from the Compass Tweaks file included with the original Atlas mod, then I have also created a FISS preset that duplicates those settings. It can be found in the downloads section, under Optional files. Installing it will overwrite any previously saved compass preset, so if you’ve created your own compass preset (and want to preserve it) then make sure to back it up first.

