Texture Pack Combiner
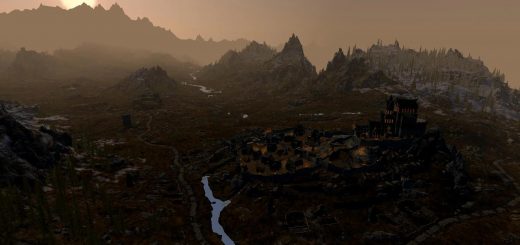
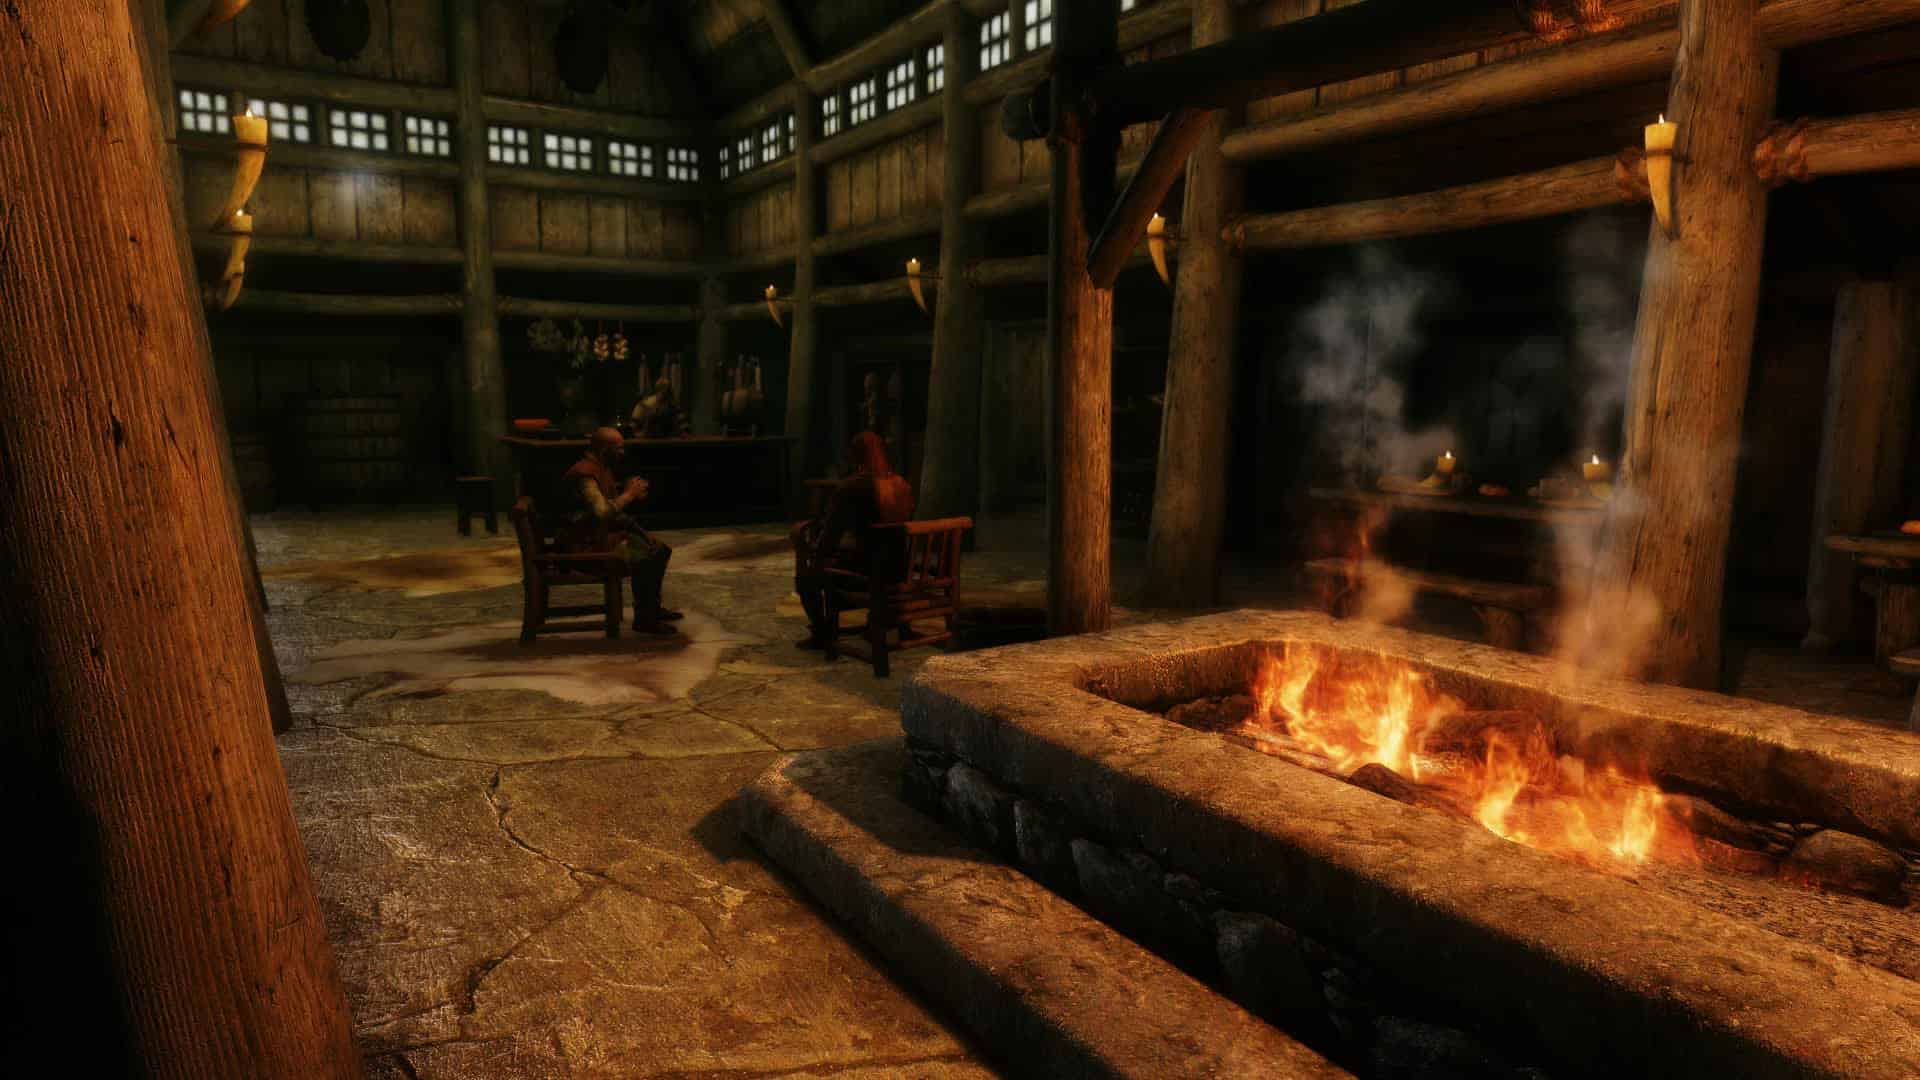
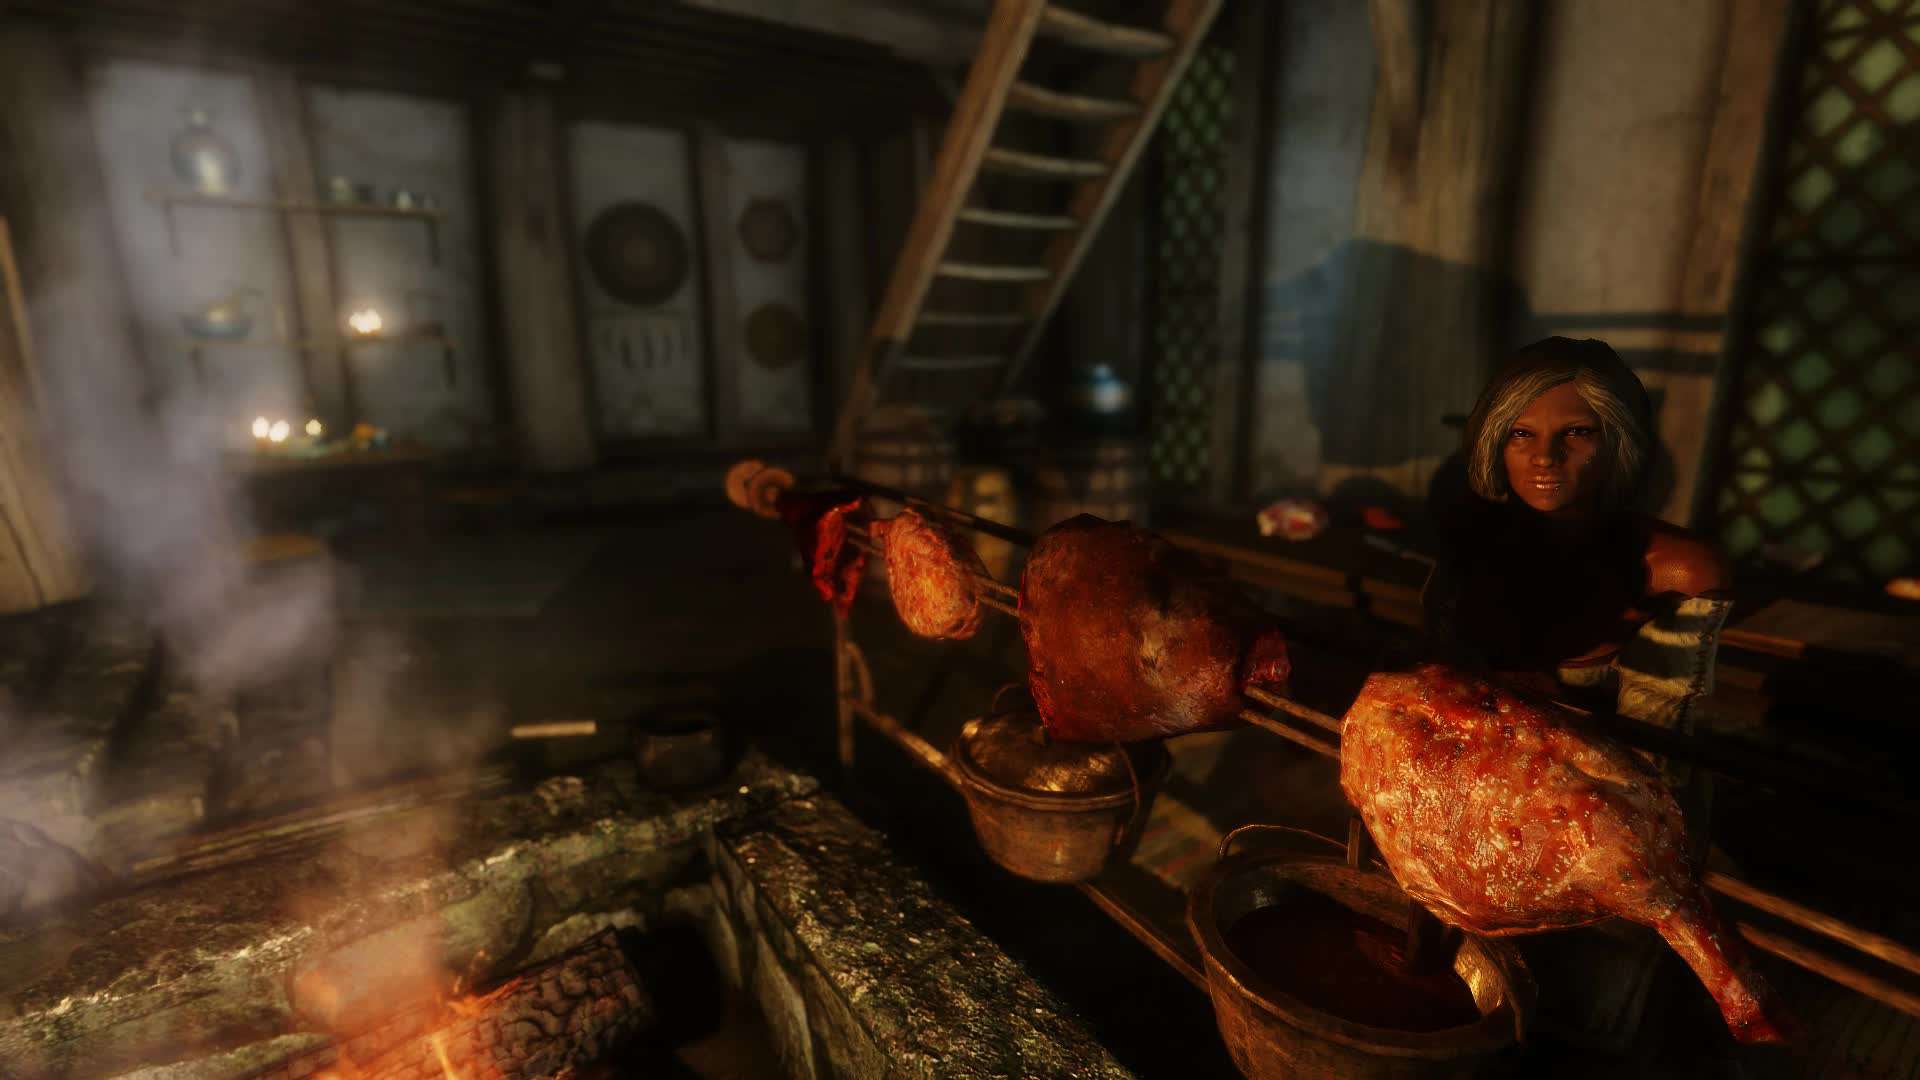
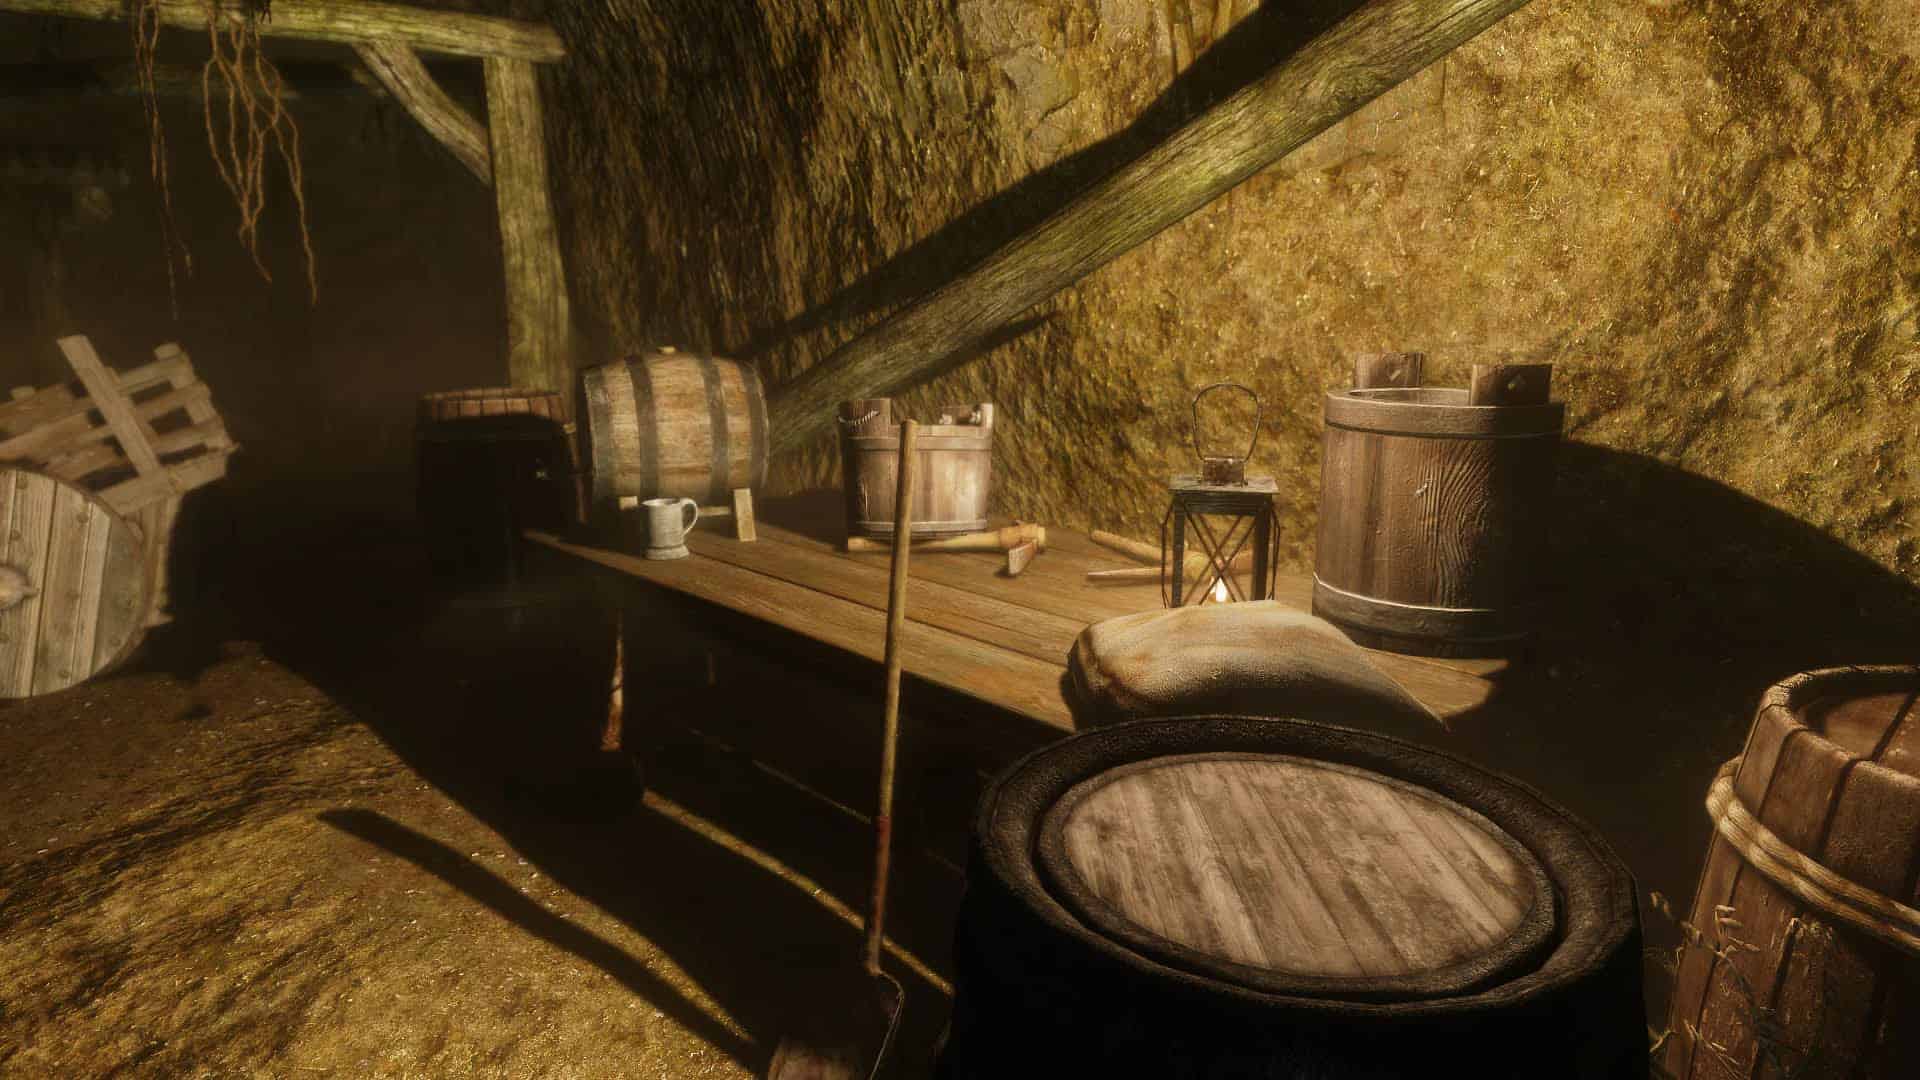
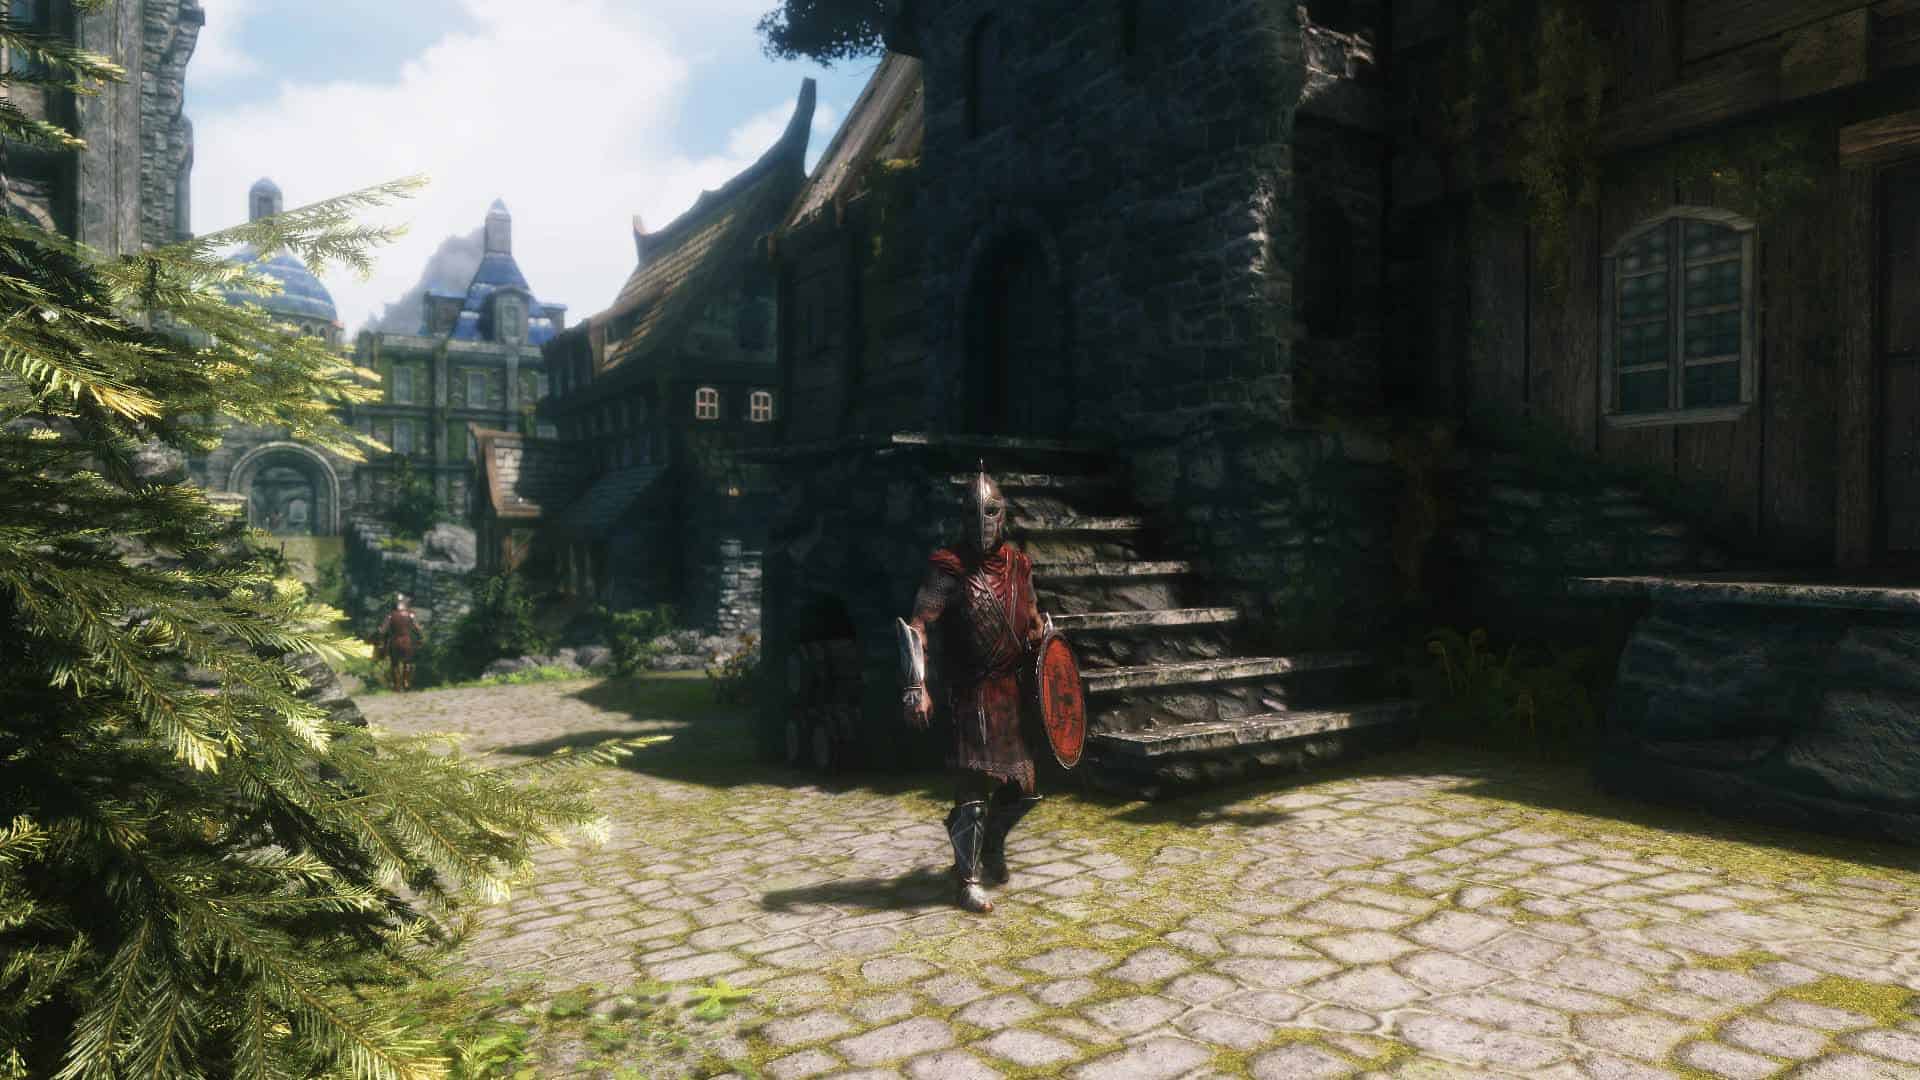
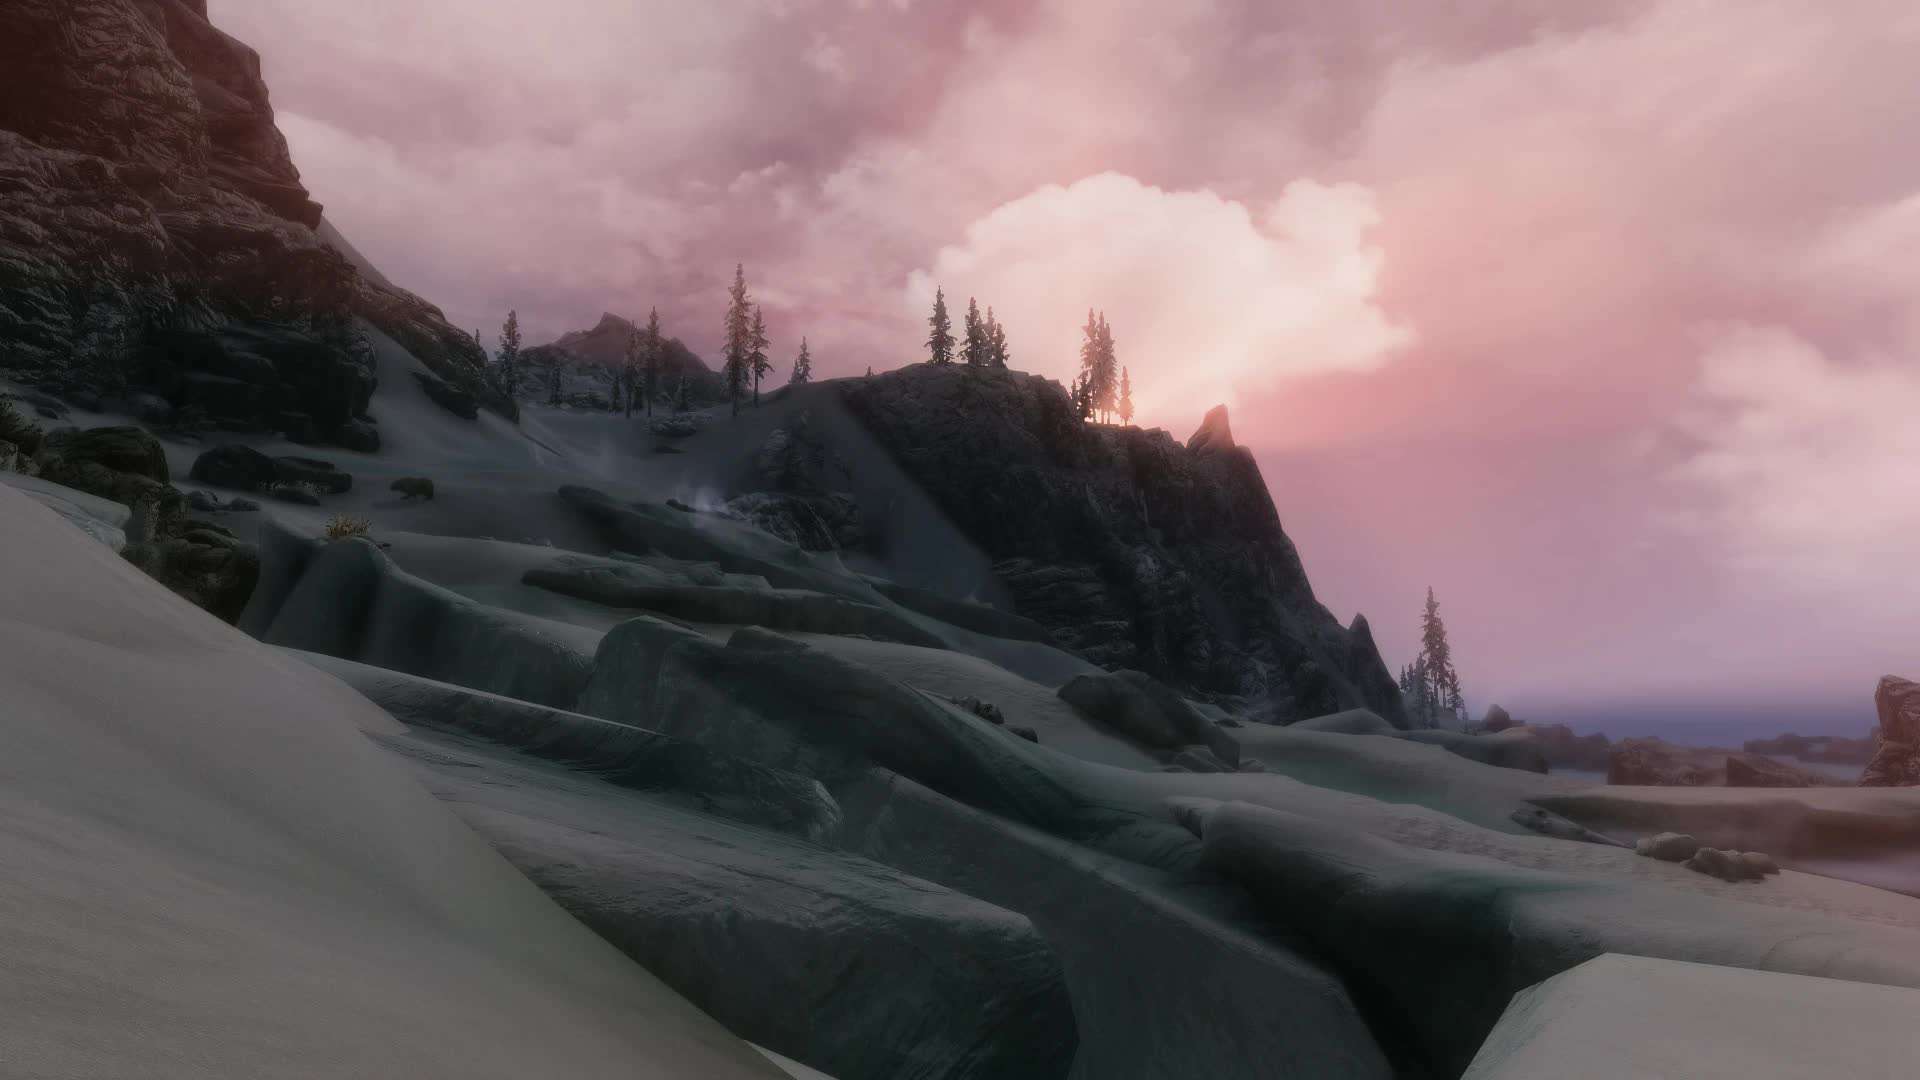
Don\’t know which texture packs to choose? Don\’t worry, this is the all-in-one solution! The Texture Pack Combiner will replace the majority of textures in Skyrim with individually hand-picked textures from over 60 different texture packs. The end result is so stunning that you have to see it to believe it!
TEXTURE PACK COMBINER
– Where worlds come together
Drigger has created an installer app for the TPC, making the installation process easier than ever!
So, what can this installer do for you? Well, you no longer have to extract archives or manually place mods in particular folders. If you prefer to keep the files extracted, you can still do so, because the installer will automatically recognize if the files are extracted into the TPC folders or not. However, with this installer, you can simply direct it to the downloaded archives for each mod. It will then extract and combine everything automatically, and can even compress it and place it in your NMM mods folder for you.
Since this application is still pretty new, don’t forget to provide your feedback by clicking the “issues” link on the download page.
1) WHAT IT IS AND WHAT IT DOES
The Texture Pack Combiner (TPC) is a utility that will merge over 60 different texture packs by hand-picking textures from each one, putting them all together into a single, fully compatible and load-order free package. The end result is a stunningly beautiful world where the majority of textures in Skyrim have been replaced.
This is not just some simple copy+paste merge similar to what you get by utilizing different load orders of your mods. There is substantial work behind it. Every single texture has been hand-picked after extensive testing with different texture combinations, and each texture has been measured against certain key points. More on that later. The bottom line is that this is the result of a rather gruesome, time consuming process that has taken hundreds of hours and thousands of screenshots and saved games to complete.
2) WHAT IT ISN’T
The TPC is not a texture pack in itself. There are no textures supplied with it. I had nothing to do with the making of any textures, as they are the work of other authors. The TPC is merely a tool that combines them automatically for you. You will still have to download any texture packs you choose, but once you’ve done that, that’s when the TPC gets into work. Just remember to endorse every modder’s work after you download them (they deserve it)!
3) BUT WHY?
Previously, if you wanted to install more than one texture pack, you would have to install them in a particular order. This was not only confusing, but also extremely inconvenient, and neither would you have any control over the fact that better textures could get overwritten by worse ones. Neither were there any control over different texture combinations. Some textures might look great individually, but when put together would create a totality that just looked unfitting or outright terrible. The only way to work around this would be to manually look up which texture is used on which surface, what its name is and then find a better replacement. If you’d do it properly, you’d even go as far as to try each and every texture in different combinations to see which would be the most appealing. The downside to this is that it’d require a lot of time and work. A lot of it. Luckily enough, this is exactly what the Texture Pack Combiner will do. Automatically. For you.
4) HOW DOES IT DO IT?
The Texture Pack Combiner is merely a batch file containing copying instructions for thousands of textures. When you run it, it will hand-pick textures from all available texture packs and merge them into a new customized texture collection, where each and every texture has been tested, compared and selected with careful consideration. So what you’ll end up with is a stunningly beautiful Skyrim where the majority of the game’s textures have been replaced. For this utility to do its magic, the only thing you have to make sure, after downloading and extracting the texture packs you want to use, is that you place them all in their correct folders for the scripted batch file to recognize them. More on that under the installation instructions.
5) SO HOW EXACTLY WERE TEXTURES SELECTED?
Textures were selected based on their qualities in several different key areas. Let me explain each of these in a little more detail:
– Texture quality
Let me begin with the obvious. A texture’s resolution, detail, sharpness, depth, colors and light reflection are all important areas in themselves. The overall quality of a texture is very important.
– Repetition
A texture might look completely perfect when viewed by itself, but as soon as you use them at a larger scale, obvious patterns may appear that will catch your eye and look very unrealistic. For example, if I use a grass texture with one big, shiny rock in it and then repeat this texture over a large surface, you will see this rock repeated on the ground at regular squarish intervals. This is really bad for immersion and is generally something any texture creator struggles to avoid.
– Transitions
A lot of hard work has been going into different texture transitions. If you have grass over here, some dirt over there, and a road down there, you will want all of these textures to agree with each other where they meet. If they don’t, you’ll end up with very apparent borders, smudges and loss of detail where different terrain and objects meet.
– Blending
Again, a texture that looks superb by itself may look completely terrible when mixed in with others. It has taken a lot of effort in finding the right combinations of textures.
– Distance
Distance can be subcategorized into three basic parts: close, midrange and distant. Textures often have the tendency to look great in one or two of these and then really bad in the third. For example, a smudgy, low-res texture might look awful when viewed right at your feet, but as you put some distance to it, it can suddenly begin to look wonderful. Move away even further and eventually it might lose detail and look bad again. There are a million examples of this and why it happens, but without delving further into it, this is the basic principle.
– Realism
Generally speaking, if there was a choice between two great textures, and one looked great in an artificial way while the other looked great in a realistic way, then the one with a more realistic look would be preferable.
– VRAM
Ah yes, the limits of video card memory. Rest assured that visual quality has never been compromized due to VRAM usage unless the texture was abnormally large. For example, there are textures out there for small objects that individually takes over 40 Mb of VRAM. This is completely nonsense use of VRAM since not even high quality mountain textures generally use this much. At the end of the day, though, I can tell you the good news that the best visual combination is NOT using the most VRAM, so what you’ll end up with is quite efficient VRAM wise, while still enjoying the best textures.
6) INSTALLATION INSTRUCTIONS
Don’t worry! The installation is super easy. I know there’s a lot of text below, but this is only because I try to cover everything into the tiniest detail. The bottom line is that you simply need to extract the texture packs into specific folders prior to running the TexturePackCombiner.bat file. In short, if you know how to extract Zip and RAR files, then you will manage!
When you extract the Texture Pack Combiner, you will find a batch file and a bunch of empty folders. All of the installation instructions can be summarized into one sentence: All you have to do is to extract the mods you download into these predesignated folders, and then run the Texture Pack Combiner utility for them to merge.
Regarding the LIGHT version of the TPC; the only difference is that it will pick some alternative textures that require less VRAM. The two versions of the TPC are NOT limited to either high or low resolution variants of each texture pack, so you can mix and match freely.
Before using the TPC, I strongly recommend that you install Bethesda’s Hi-Res DLC. It is not required, but strongly recommended. I particularly recommend the Bethesda Hi-Res DLC Optimized by Vano89, because it improves performance without any real loss of quality.
The installation instructions below are split into two parts. The first part will show you which mods you can choose from and tells you exactly which files to download. The second part covers the actual installation. Please do not skip reading anything from the installation instructions because I often get questions that are already covered here!
If you want to skip any of the mods below, then simply leave its intended folder empty!
The installation is very straightforward and there really isn’t much more to it than copying files. If you still find anything confusing, then please note that there is a YouTube clip with an installation tutorial at the bottom of this page. It is somewhat outdated, but it will at least give you a good idea how to set everything up. If all else fails, you can also try the installer app found in green text at the top of this page.
Now, let’s get started…
Installation Part 1: Getting all the mods
Begin by browsing the mods and choose which ones you want to use. To have the complete TPC intended experience you should get all of them, but you will need some time and patience to collect them all. I advice you to download, extract and place a few mods at a time. It will spare you the headache later of figuring out which mod each file belongs to, because it isn’t always apparent by their file names. More information on file placement is in Part 2 further below.
Get all the latest versions (as of 2013-08-11). Whether you choose high-res or low-res alternatives of each mod is entirely up to you.
REQUIRED MODS:
Skyrim HD – 2K Textures by NebuLa – 4 files
Download Dungeons, Landscape, Misc and Towns. If you want “full” or “lite” is up to you. Do NOT get the BSA version because it won’t work with the TPC! The v1.6 Riften textures patch is not needed.
Serious HD Retexture Skyrim by Z4G4 – 1 or 2 files
Download the high-res 2048 version or the low-res 1024 version. If you get the high-res version then also download the update.
Skyrim Realistic Overhaul by Starac – 4 files or 2 files (high-res or low-res) + 1 for Dawnguard
For high-res: Download part 1, part 2, part 3 and the 1.6 update. For low-res: Only grab the 1024k version and the 1.6 update. If you want the Dawnguard textures, then choose your resolution option and go ahead and grab those as well!
This mod is no longer available on the Nexus due to the author being banned. If you don’t already have the files, I can only recommend asking a friend if they can supply them for you. The TPC will work without this mod, but it won’t look as intended.
Installation Part 2: File placement and installation
Step #1 – Extracting the mods:
Inside each mod’s designated folder you will find a text file called “This folder”. This contains a short description on how to place the files for each individual mod. In almost all cases you simply need to extract “textures” and/or “meshes” folders into each mod’s folder. Be very careful about following the file placement instructions found in these files or you will end up missing textures!
Note that mods come with varying folder structures depending on how the author chose to compress them, so it’s your job to ensure everything is placed correctly. For example, many mods come with a “Data” folder. Do NOT extract those in there! Go directly for the “textures” and “meshes” folders unless stated otherwise!
The following mods do NOT require “textures” and/or “meshes” folders only: Bellyaches Animal and Creature Pack, Real Ice ALL-IN-ONE, Skyrim Redesigned, SMIM, WATER and Visible Windows. These mods should generally be extracted with their large amount of folders directly into their intended directories. Read “This folder.txt” found inside each mod’s folder if you are unsure about how to place the files.
Also observe that Better Dynamic Snow, Pilgrims Delight – High Hrothgar Shrine Retextures, Radiant and Unique Potions and Poisons HD and Skyrim Flora Overhaul all require ESP files placed in their directories. Again, read “This folder.txt” found inside each mod’s folder if you are ever unsure.
Skyrim Realistic Overhaul – Dawnguard: Simply extract into the “\Required Mods\SRO\” folder as usual.
Bumpy Inn and Shop Signs v3: When you extract this mod you will have 3 options. I recommend the middle “bumpier” version.
Enhanced Distant Terrain: When you extract this mod you will have 6 options. Extract only one of the “textures” folders. I recommend you pick the Classic 1024 variant.
HD Sacks Retexture: If you downloaded the 10 MB main file with all 3 sack textures inside, then you must choose one type and extract only the “textures” folder for that type. I strongly recommend type B as it is the best looking by far!
Real Ice and Snow: Don’t forget to extract/overwrite the main files with the “1 Watery Icicle” optional if you downloaded it.
Septim HD: Just extract the “meshes” and “textures” folders found right at the root of the archive. Don’t let the other folders confuse you!
Skyrim Flora Overhaul: If you downloaded any optionals, then simply extract them into the same folder and agree to overwrite.
Tobes Highres Textures: If you will use this mod together with SMIM, then don’t forget to extract the SMIM patch into this mod’s folder and agree to overwrite.
TreesHD Skyrim Variation: Don’t forget to extract/overwrite with the “Dark_version_treepineforestbark03” optional file.
When done, you should have a folder structure similar to this for each mod that you want to combine:
Texture Pack Combiner\Required Mods\HD2K\Textures\
Texture Pack Combiner\Optional Mods\Skyrim Flora Overhaul\Meshes\
Texture Pack Combiner\Optional Mods\Skyrim Flora Overhaul\Textures\
..
..
Step #2 – Combining the mods:
When everything is put into place, you can now run the TexturePackCombiner batch file.
If you skipped placing the files for any mods then you may read “0 files copied” on your screen at several occasions during the merging process. This is normal, because the batch file is unable to locate those mods.
The batch will create a new folder named “Combined” with a “Data” folder inside it. This now contains all your merged textures and meshes.
Inside the Texture Pack Combiner folder you will now also find a LOG.TXT file which will list any files that might have been missing during the merging process. If you skipped any mod then the files for those mods will be listed here. Keep in mind that SRO will list missing files from a “dlc01” folder if you skipped the Dawnguard textures, and that Skyrim Flora Overhaul will list a few files if you skipped the “Punish Your Machine Edition”. If any files from a mod that you wanted to merge show up here then that may be indicative of you having placed the files incorrectly. This means that you must correct the mistake, then delete the “Combined” folder and run the batch again. Please note also that there is a batch file limitation that may cause files not to be found if your folder structure is too “deep”. If you know your files are placed correctly and you still receive “file not found”, then try moving the TPC folder i.e. directly under C:\ and try again.
THE LOG FILE SHOULD ALWAYS BE REVIEWED AFTER A MERGE BECAUSE IT IS THE BEST WAY TO IDENTIFY ANY POSSIBLE PROBLEMS!
Note that Skyrim Flora Overhaul will show missing files if you opted for the Basic version. This is because the Regular version uses more files. A “reachshrub01_n.dds” may also show up as missing under certain conditions, but don’t worry, nothing is wrong!
Also note that Dwemer Metal Retexture will show 9 missing files if you selected the “Clean and Flat” version. This is because “Rust and Scratch” uses additional light maps that the other version doesn’t need.
Visible Windows: If you want reduced window glow (good for most ENBs) from this mod, now is the time to extract that patch into your “Combined” folder. Alternatively, you can just add it as a separate mod after the TPC in your load order. I would recommend that you use it separately unless you are absolutely certain that you need it.
I recommend that you don’t delete all the mod folders that you set up if you can spare the drive space. Many times I’ve read on the forum that people have deleted the files and are thus unable to take advantage of future updates without having to redo everything from scratch.
Step #3 – Installing the mods:
With the merging process completed, you now have two options. Choose one:
Option #1: Move or copy the “Data” folder found inside your new “Combined” folder into your Skyrim folder. It may ask to merge files and folders. Say yes to everything.
Option #2 (recommended): Compress the new “Data” folder into either a RAR or 7-Zip file. Make sure you compress this folder directly, and not the “Combined” folder itself! Put this file into NMM’s “mods” folder. If NMM is already open, then restart it so that it recognizes the new file. Activate it in NMM to use your new textures. If you don’t know where your “mods” folder is, you can find it in the settings.
Skyrim Flora Overhaul: Remember that you must add “iMaxGrassTypesPerTexure=6” under [Grass] in your Skyrim.ini or you will not see any new variants.
W.A.T.E.R.: Deactivate “WATER Plants.esp” if you don’t want the added plants. They have a noticeable contrast to Skyrim Flora Overhaul’s plants so they might not be to everyone’s liking. Also make sure that you do NOT activate any of the Dragonborn ESP files for this mod UNLESS you actually have Dragonborn installed or your game will crash on startup. If you have Dragonborn on the other hand then make sure to check either “WATER DB Waves.esp” or “WATER DB.esp” depending on if you want waves or not. Do not use both of these!
Just for clarification; “Water.esp” should always be checked.
Make sure the ESP files for any mods you chose to combine are activated, and that the TPC archive is installed/activated AFTER the Bethesda High-Res DLC (otherwise the High-Res DLC will overwrite files from the TPC)! Also note that the TPC itself uses no ESP file!
All is done and you’re good to go! Enjoy your new textures!
Looking for an ENB? I recommend Project ENB by Bronze316!
For advanced users (you can ignore this completely if you don’t even know what I’m talking about): I’d like to take this opportunity to give a warning to those that like to modify their ini-files. If you edit uGrids and set it beyond 5, the game may work perfectly fine for a long time, but eventually it will likely render your save game unusable (after about 50-60 hours seems to be the norm) by causing CTDs. This is not an issue with the TPC, but rather a problem with the game engine that is unable to handle a change in this setting. Using a lot of high-resolution textures may accelerate this process.
7) ADDITIONAL INFORMATION
TROUBLESHOOTING:
Q: When I run the TPC, I get the message “‘xcopy’ is not recognized as an internal or external command, operable program or batch file.”
A: This is because XCOPY is not pathed in your computer, which means that Windows doesn’t know where to find it. Try searching your Windows folder for XCOPY.EXE and then copy that file to the same folder as the TPC batch file. XCOPY is normally found in C:\Windows\System32.
Q: When I run the batch file, I get 0 files copied in some places.
A: If you chose not to install one or more of the mods, then this is expected, because the batch file is unable to locate the files for the mod folders you left empty. Of course, this could also happen if you misplaced something, but you have to check that for yourself.
Q: When I run the batch file, I ONLY get 0 files copied.
A: Then you have probably put things into their wrong folders. Make sure that every mod is extracted into its correct folder and that every folder’s contents coincide with the “This folder.txt” file found within each directory. This can also happen if you select “Run as administrator”, because the batch file will be executed in a different folder, making it unable to find the mod files.
Q: I’m 100% certain that I have placed everything correctly, and still nothing gets combined.
A: Then your folder structure is probably too deep. You may be getting a “Destination Path Too Long” error message, in which case you must shorten the file path by moving the TPC up in the directory tree. Try putting the TPC directory directly under C:\ or at least shorten the directory depth considerably.
Q: I ran the batch file, but my combined folder seems way too small.
A: Then you have probably put things into their wrong folders or might have forgotten to extract certain patches or updates. Make sure that every mod is extracted into its correct folder and that every folder contains the intended files as per the “This folder.txt” files found inside each mod’s folder. Also make sure that the batch file and its folder structure hasn’t been changed since you extracted the TPC archive. Additionally, make sure that you downloaded all the necessary files, because it is possible you missed something. Refer to the log.txt file that gets created after running the batch to see which files aren’t found.
Q: Why do I see flashing textures? It’s as if they move or switch to a different texture when I get within a certain distance of them.
A: This is generally an ENB problem, but could also be the case of missing parallax maps/meshes. If you remove one or both of these, this should stop happening, depending on which one is the cause of your specific problem. It may also happen in a very few places if you use SMIM, because Bethesda for some reason put two meshes inside one another. It is not the modder’s fault, so blame Bethesda for this.
Q: After I installed this, I keep crashing.
A: Textures don’t really cause crashes, unless it’s the case of your computer being way too weak to handle what you’re throwing at it, but even then you are more likely to just see missing textures than to crash. You most likely have conflicting mods, bad ini tweaks or messed up your load order somewhere. Switching certain (non-texture) mods can also have adverse side effects on your saved games, sometimes making them unusable. This can also happen if you remove a gameplay changing mod or add/remove ESP files and then load up a save that was previously using it. Finally, you could try loading an earlier save just to be sure there’s nothing wrong with your save.
FAQ:
Q: Is this mod compatible with this other mod?
A: Most mods are compatible with the TPC. Pretty much the only thing you need to keep in mind is that the TPC doesn’t change gameplay in any way, so any textures you overwrite will just look different, assuming the textures of the other mod are put behind the TPC in your load order (which they usually should). The TPC in no way prevents you from further installing mods that you like. You should see the TPC as a baseline installation on which to build upon, similar to the Bethesda High-Res DLC.
Q: Where in the load order do I put the combined TPC archive?
A: This is very difficult to answer because it completely depends on which mods you have installed and which textures you prefer to use. Generally speaking, the combined TPC textures should be at the top of your load order, but after Bethesda’s High-res DLC.
Q: I downloaded the BSA version of a mod. Can I still use this with the TPC?
A: Yes and no. You can’t use a BSA file because the batch file must be able to copy textures individually, which is not possible with a BSA file. What you can do is to extract the BSA file, however, this can be somewhat complicated if you don’t know how to do it. If bandwidth isn’t an issue for you, then I recommend you download the other non-BSA version of your mod.
Q: Why isn’t the TPC downloadable directly from NMM?
A: This is because the TPC isn’t exactly a mod, but rather a utility, and thus NMM doesn’t know what to do with it. If it was downloadable directly through NMM it would likely confuse a lot of people when nothing happens as they activate the “mod”.
Q: Will you add my favorite mod to the TPC?
A: My “to do” list is enormous, and time is precious. I’m working on combining more texture packs, but it takes a lot of time. Most mods are already compatible depending on where you put them in the load order.
Q: I want to use one of the optional mods, but I don’t want to combine it with the TPC. Will they still work together?
A: Most of the time, yes, but there are some exceptions and disadvantages by installing them separately. Project Parallax will not work when installed separately, and a separate installation of most (but not all) TPC supported mods will lead to them overwriting more suitable textures.
Q: Why don’t you just combine it all and then put that file up for download instead?
A: The TPC supports many different mods, and will keep growing. I can’t take the work of other authors, combine it, and then put that up as “mine”. That would not only be considered bad manners, but also theft.