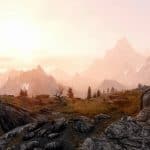
Elder Blood ENB Redux
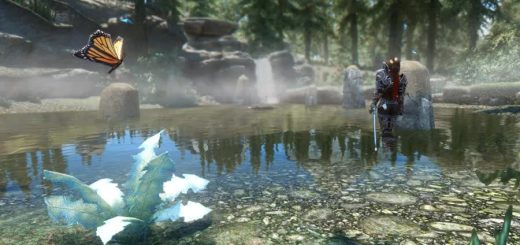
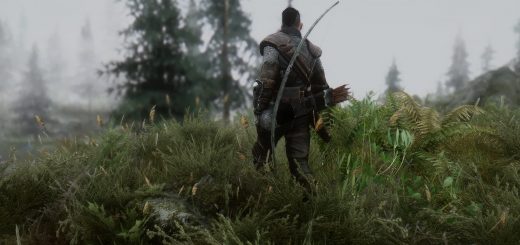
Elder Blood ENB Redux is a new version of the ENB rebuilt from the ground up.
Elder Blood ENB
What is this?
This is my custom enb preset based an older version of Serenity ENB by Prod80. This is a cinematic/fantasy enb that is relatively grounded. The name is taken from the Witcher series, no old people where harmed in the making of this ENB….
This is a demanding ENB but I have included a more performance friendly version. Please note that I will be updating this periodically.
*Gen 4*
Generation 4 is the Elder Blood ENB rebuilt from the ground up, thus the title Elder Blood ENB Redux. This new version includes over double the weather profiles as the last generation for more unique weathers. Sweet Fx has been removed for compatibility with Windows 10. Also included is an alternate “Filmic” shaders pack which mimics color graded film.
Be sure to check out the installation section for Generation 4. The enb is set up a little different than before.
*Installation and Customization*
First get the ENB binary(latest version) and ENB host from ENBdev, Boris’s website. Extract it to a folder somewhere using Winzip, 7zip, etc. Install the d3d9.dll and enb host in your skyrim directory.
Then install my enb files there. (usually …steamapps/common/skyrim)
Gen 1-3 versions require these files to run correctly. You will need:
Further Dark Dungeons
Revamped Exterior Fog
ADD or change the following lines to the SkyrimPrefs.ini (the one in My Documents), [Display] section :
bFloatPointRenderTarget=1
bTreesReceiveShadows=1
bDrawLandShadows=1
bShadowsjavascript-event-stripped1
fGamma=1.0400
Set up the enblocal, specifically the reservedmemory and videomemory, for your PC.
Gen 4 Installation:
Gen 4 installation is a bit different than previous generations. Be sure to remove any old files from previous enbs or older versions of Elder Blood enb. Follow the previous steps except for installing Further Dark Dungeons. Instead install Enhanced Lights and FX. Interior files only! This is important, when installing only choose main file. I did not design the ENB with the other options in mind.
Next step is to install Vivid Weathers. Install it like normal and have it overwrite anything if asked. After it is installed uncheck the plugin in Mod Manager. This way it installs the cloud and sky textures without using the weather effects. I optimized this enb for the clouds and sky textures with this mod, so if you don’t use it, or use another mod, you have been warned if it looks a bit odd. Or explodes.
I have found that if you do not want to use Vivid Weathers you can substitute it for Dramatic Clouds.
This installation process is a bit simpler. Just install that mod like normal, no extra required besides the aforementioned mods Ehanced Lights and FX and Revamped Exterior Fog.
That is all the extra steps. Have fun!
*Customization and optimization*
Press shift+enter to bring up the in-game ENB gui. This will allow you to customize and optimize the enb for your PC. For better performance, trying unchecking effects such as Depth of Field, Reflection, and Ambient Occlusion. Bare in mind that AO has a big effect on the visuals of the enb, but it is also has big impact on performance.
In the shaders window, under effect.txt, you can edit some of the enb effects. You can add a letterbox or remove it, just change the size percentage. You can also adjust grain, black levels, sharpening, contrast, and vibrancy to your suit your taste.
Under enbeffect.fx there are more options for things such and technicolor, tinting, split toning, and black and white. Also you can change many values of the bloom in general.
This is a look at the Gen 4 enbeffectprepass.fx, or depth of field. You can change the bokeh shape, which will change the shape of the highlights of the blur. Bokeh radius effects the amount of the blurring effect. DoF Quality will have a massive impact on performance. 1 is the most performance friendly and 7 will make your PC cry, but it will look fantastic.
The files in the “Optionals” folders are to be place in the enbseries folder. I have included back ups of the standard files as well. To install the Filmic Shaders, for example, copy the files and paste them in the enbseries folder and overwrite the previous files. Boom.
*I highly recommend you adjust in game brightness, adjust it to your liking!*
Disable any game or hardware AA or anisotropic filtering. Be sure to adjust display and in game brightness settings for best look. I tuned this ENB to my IPS monitor so it may require you to adjust yours for the best results. There are website online to make sure your black levels are set correctly on your monitor.
As far as weather or lighting mods, they might work but there is no guarantee. Anything that changes exterior lighting will probably cause the most problems. NLA, Climates of Tamriel, etc probably won’t work very well. True Storms does work though, and actually recommend using it with this enb.
This enb is pretty demanding and it might lower your PC’s self esteem.
Credits and Thanks
Prod80 for allowing me to use his base files (enbseries,bloom,etc) and for being a cool dude.
Boris for ENB
mannygt for sunsprite file
pinkfirefly135 for lens
amoebae for lens pack file
Matso for Skryim Visual Immersion Enb Resource (used sunsprite)
Andrej Dudenhefner – Creator of SMAA injector
Christian Jensen – Creator of SweetFX
ZeroKing – Ported shaders to ENB
Kingeric1992- enbeffprepass for v2 and lens enbprepass for gen 4
Kyokushinoyama- Lens file found in Lens Texture file by amoebae/bloom and sunsprite in Gen 4
-for lensmask in Gen 3
tetradoxin- enbprepass for gen 4
Umeyr- SMAA injector
Demidekidasu- color palette for Alterna shaders


