Simple multiple followers (Advanced version)
Allows up to 10 followers and 10 pets.
Simple multiple followers (advanced version)
Note that this mod contains advanced features. The “simple” tag in the name refers to how the mod integrates with the game. I.e it uses the base game’s recruit and dismiss features rather than a custom-made recruit and dismiss system. Also note that a copy of this document exists in the Skyrim\\Data\\Docs folder.
Version: 0.875
Date: 13 December 2017
Author: kuertee, vidalia for “ignore friendly hits” feature and testing
Requirements:
Skyrim 1.9
Skyrim Script Extender
Optional other mods:
Battle fatigue and injuries Like all actors, followers will get injured. They will need bandages, rest or a healer to overcome an injury.
Eat and sleep Features from EAS are used when followers eat, drink and sleep. E.g. auto-slice large food items, waterskin, bed comfort.
Horse commands Followers will ride any of your available horses.
Skill-based damage multipliers Like all actors, followers’ damage output is modified by their skill levels.
Useful potions Like all actors, followers’ Health, Magicka and Stamina regeneration rates are minimised.
FISS allows you to import and export your mod settings to and from an external XML file.
Compatibilities:
All followers from current and future DLCs and 3rd party mods that use the default game’s DialogueFollower quest for their recruitment as a follower are supported.
All followers from current and future DLCs and 3rd party mods with their own recruit/dismiss system and do not use the default game’s DialogueFollower quest are ignored and, so, are compatible.
Incompatibilities:
3rd-party mods (i.e. NOT SMF, but other 3rd-party mods) that edit DialogueFavorGeneric quest will conflict with each other and only the last-loaded of those mods will have their NPCs recruitable. Use the Force-recruit feature on NPCs that can’t be recruited because of this conflict. SMF does not edit any of the base files – allowing it to be compatible with other 3rd party mods.
Short description
Allows up to 10 NPC “normal” followers, up to 10 NPC “special” followers and up to 10 pets.
Quick start
It’s best to read the HTML version of this document, located in Skyrim\\Data\\Docs folder, because it provides a clickable menu to all the sections.
Step 1: Quickly read these 3 sections: “Requirements”, “Install” (and “Updating”) and the “Uninstall” sections.
Step 2: Read the “Cheat sheet” section below. And do a very quick read of available configuration settings in the “Configuring the mod” section.
Step 3: Play.
Step 4 (when something is wrong): Only when you think something is wrong, or when you don’t understand how a feature works, should you open this document again. Also search for keywords to quickly “jump” to a possibly relevant section. It’s better than reading this from top to bottom.
Step 5 (when something is REALLY wrong): If you feel that something is really wrong in your game, read the “Troubleshooting”, “Creating a clean save”, and “Script logging” sections below. A log of your game session helps in determining the problem and in finding solutions for it.
Updates since last release (0.86)
0.875, 13 December 2017:
Overhaul: Avoid traps AI:
Trigger boxes are now used to manage the follower’s trap avoidance AI. Previously, the follower’s distance and location from the trap were polled to determine their AI: jump, wait, walk. Trigger boxes are less process-intensive than polling.
Jump over traps AI: 8 points around the trap are now used to determine “safe” jump destinations. These points are dynamically set as you and followers jumps or moves around the trap. Previously, only your entry and exit vectors across the trap were used to determine the follower’s start and finish jump angles.
Combat around traps AI. A better implementation of the how followers avoid combat when near traps. Followers will avoid combat near traps unless they get hit – in which time their AI will revert to the default, allowing them to immediately fight back.
Followers are “essential” (i.e. protected from death) when near traps. They still trigger traps, after all. But dying “stupidly” is an annoyance. And for those who prefer traps to still be meaningful, where followers are concerned, might find this option preferable to followers not triggering traps at all as provided by other mods.
Bug fix: Jam traps: Previously, unjammed traps goes through a reset process. In this version, only jammed traps are reset and unjammed traps are left alone.
Tweak: “Leave my fights to me” AI. As per the previous version, followers who get hit reverts their AI to the default allowing them to fight back. But in this version, this “fight back” reaction is immediate.
Bug fix: Re-equiping adventuring gear. Followers now equip their full adventuring gear when combat starts or when they draw their weapons.
Overhaul: Casual clothes AI when not in combat and no weapon is out:
In town: Non-armor clothes (rich clothes have priority), non-armor headwear, gloves, shoes.
At home: Non-armor clothes (rich clothes have priority before 9pm), no headwear, no gloves, shoes.
Elsewhere: no helmet, gauntlets.
Outdoors and raining or snowing: hoods have priority over hats, capes when raining, cloaks have priority over capes when snowing.
Vampire followers outdoors: hoods during the day or when raining or snowing. (I.e. no hoods during clear nights. They do love the dark, after all).
Vampire followers in inns: hoods.
Followers randomly choose what to wear from up to 5 items per apparel type.
Note that hoods need to have “hood” in their item name for the followers to recognise them as hoods. Capes need “cape” in their name. And cloaks need “cloak”.
Replacement: the move aside AI (which forces the follower to move away from you when you face and bump into them) has been replaced by a general “move away” which makes them move away (350 units) anytime they near you (less then 300 units).
Tweak: When userAvoidCombatAIOnRecruit is set in the MCM, followers will avoid combat at recruitment (or when they are re-loaded from FISS). You can still ask them to “avoid combat” or “assist in combat” from their Dialogue Menu.
Bug fix: When Eat and Sleep mod is installed, and the follower’s Eat and Sleep feature is enabled, followers’ waterskin are filled when you collect water from lakes and rivers.
Bug fix: The “loot” version of the “Equip/loot from …” command would fail if looting wasn’t already in progress.
Bug fix: “Equip/loot from …” menu item is now unavailable while a previous “Equip/loot from …” is in progress. Previously, the menu item was available even if the command failed because the previous “Equip/loot from …” was in progress.
Bug fix: The missing “Vampire feed” script is included in this package.
Bug fix: Followers would sometimes loot when in stores.
Tweak: Storing/dumping loot after exiting a looted interior: Do not limit finding Horse Command horses that are in your forward direction, instead find horses anywhere in your vicinity.
New feature: “COC kuSMFCell” in the console to teleport to SMF’s hidden cell which holds all the containers the followers use for looting, the party food bin, and other containers used by the mod. Before deactivating the ESP on uninstallation, check these containers for items that may have been left due to a uncompleted process caused by a bug or crash.
Updating from previous versions
If you have FISS, export the mod’s settings and game data with FISS from the Troubleshooting section of the MCM.
Remove the previous version by creating a clean-save. Read the section, “Creating a clean save”, below.
Install this new version.
Import the mod’s settings and game data with FISS from the Troubleshooting section of the MCM.
Cheat sheet
After recruiting followers, SMF’s Sandbox AI may immediately trigger (making them sit on a chair, leaning post, etc). This may look like they ignored your recruitment and are not following you. But they actually have been recruited and will follow you.
Follower Command Panel (“(9” key) to command nearby followers. This key also returns the 3rd-person follower camera to you.
Followers eat, drink and sleep: Keep their food and drinks inventories stocked. Sleep regularly. Ask the follower “How are you?” to see their satiation/hunger levels, hydration/thirst levels, energy/exhaustion levels, food supply, drink supply, waterskin level. When hungry, thirsty or tired, they will ask you for food, drink or rest before looking for an inn. For more information, read the “Eat, drink and sleep” section, below.
Disable/jam traps: To disable a trap, jam an object into it. Do this by holding a “grabbed” object towards it. It will be highlighted green as you approach it with a grabbed object. Keep moving closer until the grabbed object is jammed into the trap. It will be highlighted red when this happens. Pressure plates require that you are sneaking but other traps can be jammed while standing. Note that this is still a dangerous activity in that you could still set off the trap. For more information, read the “Disable/jam traps” section below.
Trap avoidance AI: Followers will wait at “non-jumpable” traps. Use the Follower Command Panel to order them to traverse the traps when it is safe. Read more in the “Trap avoidance AI” section below.
Looting AI: After combat and after moving, any containers and corpses in front of you will be looted. Each container or corpse will be highlighted blue, to notify you that they can be looted. Then they will either be highlighted green, to notify you that a follower has been assigned to loot them. Or they will be highlighted red, to notify you that they can’t be looted for a reason. Some reasons that prevents containers or corpses to be looted are: enemies, near a trap, combat started, etc. For more information, read the “Looting AI” section below.
During the looting cycle, you can “tag” containers not already tagged for looting by putting them into your crosshairs. If the container has already been looted, it will be highlighted red. Tagged containers allow followers to loot them regardless of whether they are reachable by them or not. (I.e. They are reachable by you.) Read more in the “Looting AI” section below.
Storing AI: When at home, followers will loot containers (to check if any items in them are usable) and then store unequipped armour and weapons back into the container. Read more in the “Storing AI” section below.
Followers will dump items into Horse Commands saddlebags after exiting a dungeon. Although not necessary, it is recommended that you allow this to happen after exiting a dungeon.
Key: “O” (for open) while a container is in the crosshair while at home to allow or disallow containers for followers’ use.
Key: “O” (for open) while an NPC or a follower is in the crosshair to open the NPC Debug Panel, which includes the “Force recruit” option. When a follower is in the crosshair, it opens the Follower Debug Panel, which contains the “Force dismiss” option.
Vampire players: You can now feed on your non-vampire followers. This option is available in the Follower Activation Menu. Note the base-game bug of sometimes making you stuck in place after feeding is not fixed in this mod. If this happens, feeding again releases you from the bug.
If you find followers who do not accept your dialogue, or any NPC who SHOULD accept your dialogue but do not, press the “O” key (for open) while they are in your crosshairs and unstick them from exclusive topics. For more information, read the “Fix stuck in Exclusive Topic” section below.
Give your followers casual clothes (including hoods, capes, and cloaks) and they will wear appropriate apparel in different conditions: non-armour clothes in towns and cities, hoods and capes or cloaks when raining or snowing, etc.
Gameplay changes
Allows up to 10 NPC “normal” followers, 10 NPC “special” followers and 10 pets.
Follow and sandbox AI
“Normal” followers use a custom-made follow AI Package. This AI Package lets followers (and pets) travel along the same direction as you – which allows them to, sometimes, overtake or travel along beside you.
“Special” followers do not use this AI Package, however. Read more in the “Special followers” section, below.
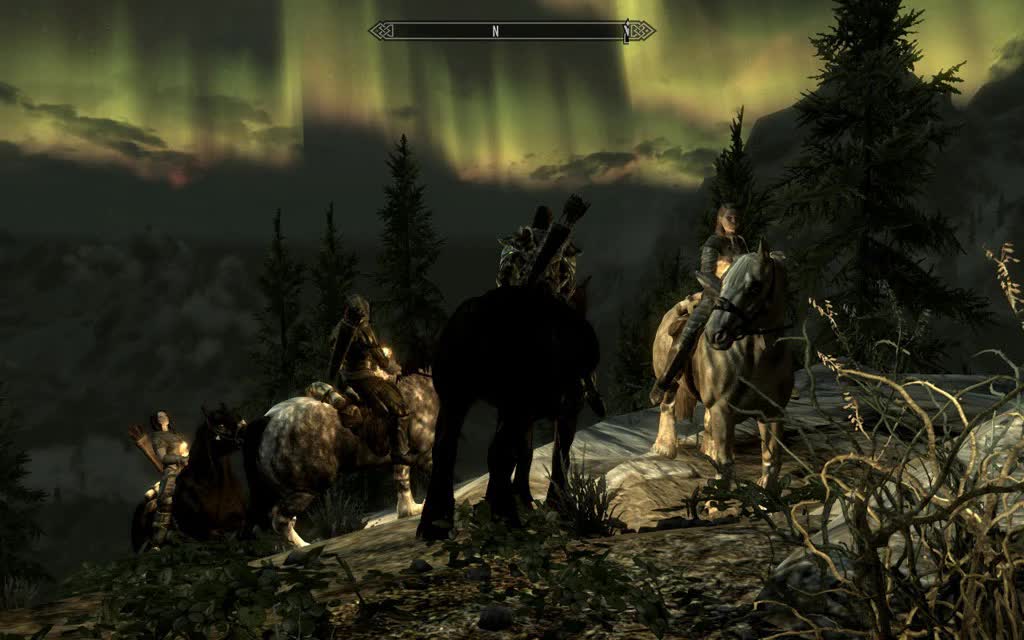
Both “normal” and “special” followers use the custom “sandbox” AI. Followers start their sandbox AI after you stop moving for 5 seconds. They stop their sandbox AI when you move 500 distant away. You can command them to “Stop relaxing” in the “Follower Command Panel”.
A note about Serena: Her willingness to wait is determined by a variable in her Script, called IsWillingToWait, and other conditions in her AI. It’s likely that sometimes she will ignore your “wait” and “follow” commands because of this.
Follower activation menu
Required setting: userUseFollowerActivatijavascript-event-stripped True (default).
Description: Non-conversational dialogue options are removed from the Dialogue Menu and are added to an Activation menu. If userUseFollowerActivationMenu is not set, the menu items are shown in the follower’s Dialogue Menu.
I recommend that this is enabled. This prevents followers from getting inserted into the DialogueFollower Quest while another follower is in it. Read more in the “Normal followers” section below.
Follower Command Panel for nearby followers
Opened with: key-press named userWaitAllFollowAllKey (default = 10, which is the “(9” key)
Description: You can command nearby followers from this panel. Note that enemies may be attracted to your calls when given to out-of-sight followers.
Or you can choose to command only one follower.
To revert the panel back to commanding all nearby followers, choose “Command another follower”. Then choose “Cancel”.
Assit/don’t assist in fights AI
Description: command them to either to “Leave me to my fights” or to “Assist me in fights” from their Dialogue Menu or from the Follower Command Panel. Hint: you can call them into fights from afar.
When commanded to “Leave me to my fights.”, followers will move away from you when you are in combat or when you’re weapon(s) out. They will not engage in any combat unless they receive damage from an attack. When commanded to “Assist me in fights.”, followers will act as per the base-game – bloodthirsty.
Optional setting: userAvoidCombatAIjavascript-event-stripped False (default)
When set, followers automatically “leave your fights to you” at recruitment.
Follower camera
Description: You can watch your follower with the 3rd-person camera from the Follower Command Panel. The 3rd-person camera will also follow one of your followers when you command them to “follow me” (e.g. from the Follower Command Panel) after they’ve been command to “stay”. The 3rd-person camera will return to you when the followers get near you or when combat starts.
Cancelling the 3rd-person camera: Key-press named userWaitAllFollowAllKey (default = 10, which is the “(9” key on the keyboard.)
Additional dialogue
“Come with me and get the others.” in the Dialogue Menu, “Follow me.” in the Follower Command Panel, “All nearby, follow me.” in the Activation menu:
Calls all nearby followers to follow you.
“Do something” in the Follower Command Panel:
Asks a follower to do something for you.
“Equip/loot from …” in the Dialogue Menu and in the Activation menu:
Will allow the follower to equip whatever item its base AI determines is best or loot from a secondary container. See “Looting AI” and Equipment Management” section below.
“Follow me while traversing the traps.” in the Dialogue Menu, “Traverse the traps” in the Follower Command Panel:
Commands all nearby followers who are waiting at traps to traverse them.
“Follow these instructions when looting.” in the Dialogue Menu and in the Follower Command Panel:
Set a specific follower’s looting preferences for armour and weapons. Enable/disable their looting AI. Allow/disallow them from receiving distributed loot.
“How are you?” in the Dialogue Menu:
Displays the follower’s satiation/hunger level, hydration/thirst level, energy/exhaustion level, food supply (in hours), drink supply (in hours) and waterskin level. You can also access the party food bin from this menu.
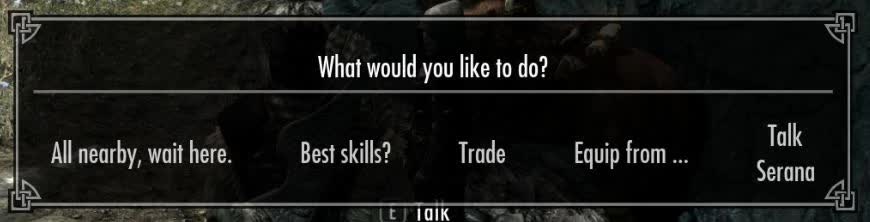
“Wait here with everyone.” in the Dialogue Menu, “Wait and hold position.” in the Follower Command Panel, “All nearby, wait.” in the Activation menu:
Commands all nearby followers to hold their position and wait for your call.
“What can you do?” in the Dialogue Menu, “Best skills?” in the Activation menu:
Lists their top 3 skills and their armour preference.
“Leave my fights to me.” in the Dialogue Menu and in the Follower Command Panel:
Makes them move away from you when you’re in combat.
“Assist me in fights.” in the Dialogue Menu and in the Follower Command Panel:
Allows them to fight with you.
Eat, drink and sleep
Required setting: userFollowersEatAndSleep = True (default)
Optional setting: userEASAutoGoToInn = True (default)
Description: If userFollowersEatAndSleep is set, followers will eat and drink from their inventory and will sleep when you sleep. They will eat when they sit down during their Sandbox AI or when their Satiation level drops below 0 – when they become hungry. They will drink when they sit down or when their Hydration level drops below 0 – when they become thirsty. They will sleep when they lie down or when you sleep.
They don’t receive any penalties when hungry, thirsty or tired. Instead, they will nag you for food, drink and rest. If their requests are ignored, they will leave you and visit the nearest inn for 24 hours. However, if userEASAutoGoToInn is False, they will instead nag you every 12 hours until their needs are met. Followers away from you (i.e. followers more than 7500 distant or waiting for you) for more than 24 hours will: (1) have their satiation and thirst restored without taking food and drink form their inventory, and (2) will have their energy replenished automatically.
Satiation, hydration and energy are restored in one of two methods.
By default: Hunger is satiated by 12 hours for every 1 weight of food. Any food less than 0.25 weight is considered 0.25 weight. Thirst is quenched by 12 hours for every bottle of drink. And an hour of energy is recovered for 2 hours of your sleep.
THIS IS OPTIONAL: If the mod, “Eat and sleep”, is installed, the features from that mod that are listed below are used. Read the read-me of “Eat and Sleep” mod for more information.
12 hour satiation for every 1 weight of food. Cooked food satiation level is doubled.
To minimise wastage, large food items (i.e. more than 0.25 weight) are automatically cut-up into 0.25 weight portions.
Alcoholic drinks hydrate only for 6 hours.
Non-alcoholic drinks hydrate for 12 hours.
Followers have a waterskin that has a capacity to hold 3 days worth of water. Waterskins are automatically filled when entering and leaving an inn, or when your waterskin level is filled.
The comfort level of your sleep (e.g. bed value: bedroll, common, upperclass, noble, and sleeping conditions: outdoors and sleeping near the dead) determines the amount of your follower’s energy that is restored per hour of your sleep.
Eat, drink and sleep “lite”
Required setting: userFollowersEatAndSleep = True (default)
Required setting: userEASLite = True (default)
An option to simplify this feature is available. If userEASLite is True:
Every food offers 12 hours of satiation. Each drink bottle hydrates for 12 hours. Their energy is replenished to the full with any number of hours that you sleep.
When entering an inn, satiation and hydration are automatically replenished without taking food and drink from their inventory.
No features from the mod, “Eat and sleep”, are used even if it is installed.
Party food bin
You can access your followers’ food bin by asking them “How are you?” from their Dialogue Menu. You can add food and drink into this food bin.
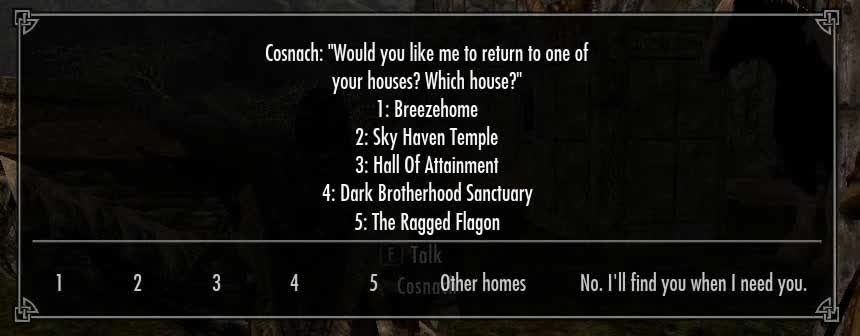
Go to my home
Required setting: userGoToMyHome = True (default)
When dismissed, your follower can be ordered to go to one of your homes or to one of the guild house you are a member. All homes and all guildhouses from the base game are supported. New houses (i.e. locations with the LocTypePlayerHouse Keyword) will become available in the list when you enter them. Note that this feature is disabled when the 3rd-party mod, My Home Is Your Home, is active.
Looting AI
Auto-looting
Required setting: userUseAutoLootAI = True (default)
Description: If userUseAutoLootAI is set and when in a dungeon location (i.e. in an interior cell and when an enemy was detected), followers will automatically loot container and corpses that are in your near-field-of-view. Containers (and corpses) near each other will be looted by one follower. If there are items left in the container, the follower will distribute them to other followers.
If set to false, they won’t loot until you command to. Either use the Follower Command Panel or the “Equip/Loot from …” menu item in the Follower Activation Menu.
After combat and after moving, any containers and corpses in front of you will be looted. Each container or corpse will be highlighted blue, to notify you that they can be looted. Then they will either be highlighted green, to notify you that a follower has been assigned to loot them. Or they will be highlighted red, to notify you that they can’t be looted for a reason. Some reasons that prevents containers or corpses to be looted are: enemies, near a trap, combat started, etc.
When at home, followers will loot from container that you’ve allowed. After looting, they will dump their inventory into the container. Note that they still follow the storing rules of keeping consumables. E.g. 50 ammo, 5 health, magicka, stamina potions, 2 drinks and 2 weights of food. Read the “Storing AI” section below.
If userLootingNotificationFreq is set to 1 or 2, containers will be highlighted different colours depending on their different stages of looting. This helps in “seeing” what your followers are doing.
Blue = ready for looting, no follower assigned.
Green = a follower has been assigned or the container is currently being looted.
Red = has been looted or can’t be looted.
Some reasons why containers or corpses can’t be looted:
nearby enemies
is near a trap
was previously unreachable by another follower
Detailed below is how this process works.
The looting follower can’t be in combat.
To trigger the auto-looting AI, stop moving and face the containers or corpses that you want your followers to loot.
Containers and corpses that can be looted will be highlighted blue – unless userLootingNotificationFreq is 0.
Invalid containers and corpses (e.g. empty) will then be highlighted red and will not be looted.
Valid containers and corpses will be assigned a looter and will be highlighted green.
Unreachable and or locked containers and corpses will not be looted.
You can “tag” containers and corpses to loot by putting them in the crosshairs. A tagged container or corpse will be highlighted green and will be looted regardless of whether it is reachable or not.
You are free to move ahead to continue adventuring or to find more containers and corpses to loot.
Once assigned (i.e. the container or corpse has been highlighted green), looters will keep looting until they are finished, they enter combat or you enter a new load-area.
Manually-started looting
Instead of letting the followers start the looting process, you can manually command them. Use the “Start looting” command in the Follower Command Panel.
Containers and corpses in your near-field-of-view will be looted as described above.
Targeted looting
Use the “Equip/loot from …” menu item in the Follower Activation Menu
To command a follower to loot from a container, follow these steps
Put the container or corpse in your crosshair.
Move to your follower – making sure that no other “activatable” object or NPC (including other followers and other containers) get into your crosshair.
Activate the follower.
A menu will open which gives you an option to command the follower to loot the container or corpse.
The follower will go through the looting process as described below.
The looting process
The followers will take all items in the container or corpse.
Every item they equip which they are not allowed to equip will be returned to the container or corpse. This will cycle until all their equipped items are allowed for them to use.
Any armour or clothing that are not equipped by the follower but were equipped by the corpse will be returned to the corpse. Basically, the corpse will not be left undressed. The exception to this is when the follower does equip and is allowed to equip the armour or clothing.
Items that were returned to the container or corpse will be distributed to another follower.
That follower will go through the same process.
Unlike in previous versions, you will not be notified of looted keys, spell and skill books. This is because this version doesn’t track the items in the container, like in previous versions.
Consumables (ammo, drink, food and potions) will be pooled and then divied-up at the end of the looting cycle.
Each follower’s looting preferences for armour and weapons, which are based on their best skills, are set when they are first recruited. They can be changed by choosing the “Follow these instructions when looting.” dialogue or Follow Command Panel menu.
During the looting cycle, you can “tag” containers not already tagged for looting by putting them into your crosshairs. If the container has already been looted, it will be highlighted red. Tagged containers allow followers to loot them regardless of whether they are reachable by them. (I.e. They are reachable by you.)
Distribution from the looter to another follower works like this:
If there are items left in the looted container, the looter will move to another follower to “distribute” the left-over items.
The recipient then goes through the same process described above (i.e. take then return any unequipped items).
If there are still items left, the original looter will move to the next follower.
This repeats until all other followers had a chance to “look into” the looted container.
Note that the system checks against items in the chest against a follower’s loot preferences and allowed equipment for use. The “distributor” skips followers that do not match this test.
Storing AI
Required: When in player homes (LocTypePlayerHouse) or when “looting” Horse Commands saddlebags.
Description: When at home and after the looting process, described above, followers will dump/store their inventory items into “allowed” containers. Horse Commands saddlebags are never looted from. Followers only dump their inventory into saddlebags.
Followers will dump all inventory items except for these:
equipped armour and weapons,
up to 50 ammo, if the follower’s weapon loot preference is for ranged weapons,
up to 5 Health, 5 Magicka and 5 Stamina potions,
up to 3 drink items, up to 2 weight of food,
Followers will only dump items that are of the same types that are already in the container. E.g. the follower will not dump food items in a container without food items.
These are the item types that the storing AI uses to determine if an item is allowed in a container. Only items of the types that are already in the container will dumped in that container.
Armour, clothing, jewelleries
Weapons
Ammo
Potions
Scrolls
Books
Ingredients
Foods
Drink items
Keys
All others
Allowed storage containers
Description: When at home, followers will only loot from and store into containers that you’ve allowed them to use.
To use: key-press named userDebugKey (default = 24, which is the “O” key, as in “open”) while the crosshair is on a container
Trap avoidance AI
Required setting: userUseTrapAvoidanceAI = True (default)
Description: There are six features that help followers avoid traps. These are:
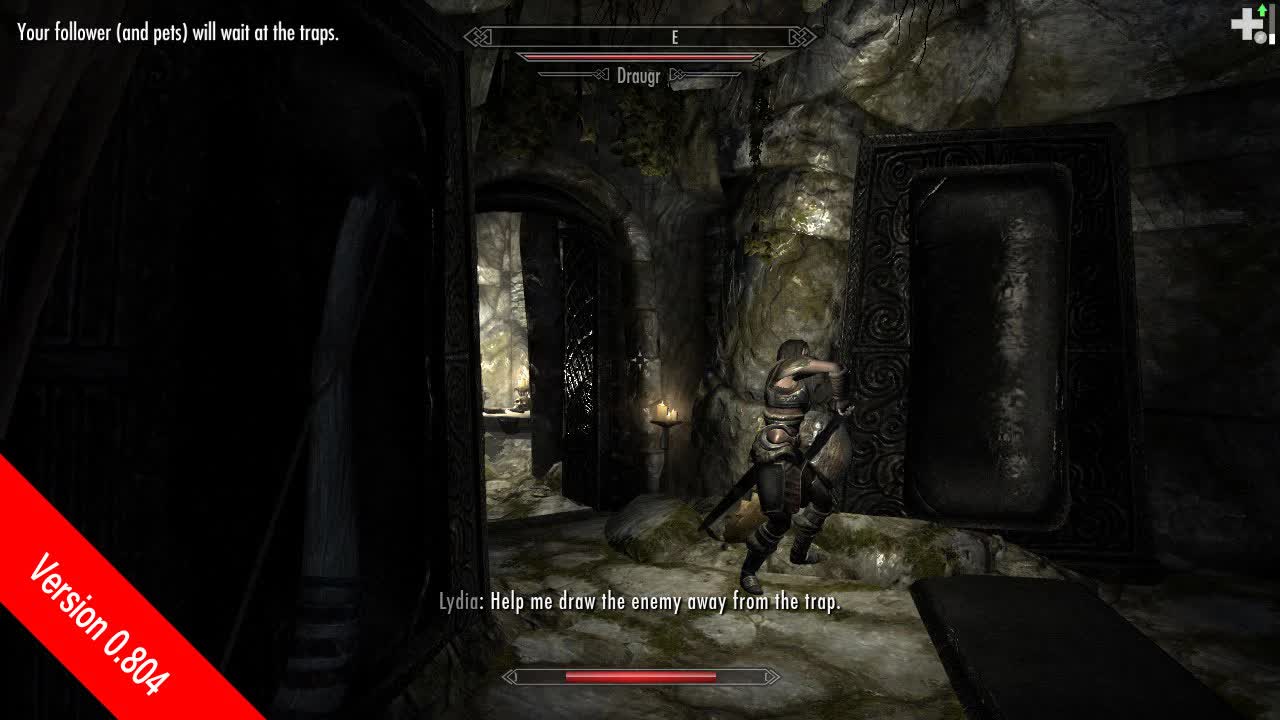
Avoid combat near traps:
Required setting: userUseTrapAvoidanceInCombatAI = True (default)
Followers will not engage enemies away from traps by fleeing away from them – effectively luring enemies away from traps. However, they will engage enemies who hit them regardless of any nearby traps.
“Essential” when near traps
Followers are “essential” (i.e. protected from death) when near traps.
Jump-over jumpable traps for bear traps, pressure plates, trip wires, etc.
This is actually a short teleport to the other side of the trap. Note that followers can still trigger the trap, however. It’s still best to jam these types of traps. Read the “Disable/jam traps” section.
Move away from traps:
Followers will generally move away from traps. And followers will move away from you when you are near a trap.
Wait at traps for spear traps, swinging blade traps, spinning threshers, piston traps, oil pools, fire plates and pressure plates:
Followers will wait at the edges of these traps until you order them to traverse the traps.
Optional setting:userUseAutoTraverseTrapAI = False (default)
When userUseAutoTraverseTrapAI is set, followers will determine for themselves if the trap is safe to traverse. E.g. you don’t need to call them with “Traverse the traps” from the Follower Command Panel after turning off the trap.
Walk across traps for fallen boulder traps and floor spikes:
Followers will negate (or minimise) damage by slowing their speed while crossing these obstacles.
Disable/jam traps
To prevent followers from triggering traps, disable them. To disable a trap, jam an object into it. Do this by holding a “grabbed” object towards it. It will be highlighted green as you approach it with a grabbed object. Keep moving closer until the grabbed object is jammed into the trap. It will be highlighted red when this happens. Pressure plates require that you are sneaking but other traps can be jammed while standing. Note that this is still a dangerous activity in that you could still set off the trap.
Equipment management
To use: Activate the “Equip from …” menu item from the Dialogue Menu or the Activation menu.
Description: Followers will take all items from the specified container (e.g. warddrobe, chest, saddlebag) or inventory. Then their base AI will equip whatever it determines is best. Any unequipped items that were taken from the container will be returned. To use a container apart from your inventory, target it with the crosshair before activating “Equip from …”. Note that this process takes several steps and menus. Activate “Equip from …” away from danger.
“Equip only what I give you.” menu item:
To force followers to use only what you give them, they will give to you items that are of the same type as those given to them.
Other equipment options: There are other equipment options available in this feature. They are self-explantory and are not listed here. See them in-game.
Casual clothes
Required setting: userProtectOutfitData = False (default). Read the “Outfit data override” section.
Required setting: userFollowersUseCasualClothes = True (default)
Description: When not in combat and no weapon is out, followers will wear casual clothes according to these rules:
In town: Non-armor clothes (rich clothes have priority), non-armor headwear, gloves, shoes.
At home: Non-armor clothes (rich clothes have priority before 9pm), no headwear, no gloves, shoes.
Elsewhere: no helmet, gauntlets.
Outdoors and raining or snowing: hoods have priority over hats, capes when raining, cloaks have priority over capes when snowing.
Vampire followers outdoors: hood during the day or when raining or snowing. (I.e. no hoods during clear nights. They do love the dark, after all).
Vampire followers in inns: hood.
Followers randomly choose what to wear from up to 5 items per apparel type. E.g. from one from up to 5 casual clothes will be chosen, one from up to 5 hats will be chosen, etc.
Note that hoods need to have “hood” in their item name for the followers to recognise them as hoods. Capes need “cape” in their name. And cloaks need “cloak”.
Sandbox AI
Required setting: userApplySandboxToFollowers = True (default) and/or userApplySandboxToSpecialFollowers = True (default = False).
Description: When waiting or when you have not moved (for about 10 seconds), followers will “go about their business”. Non-waiting followers will automatically follow you again when you move away from them.
Outfit data override
Required setting: userProtectOutfitData = False (default).
Description: Every NPC’s Outfit data will always force them to equip only items listed in their Outfit data. To make followers use gear not listed in their Outfit data, their Outfit data is “nulled” when they are recruited. The Outfit data is restored at dismissal. This is required because outside the mod’s Aliases, NPCs with a null Outfit data will be naked. Also note that this doesn’t override followers’ gear selection AI. Their AI may still determine that an item in their Outfit data is best for them. Take those items from their inventory to force them to equip other items. Use the “Equip only what I give you.” feature, which is described above, to force them to wear what you want.
Follower Debug Panel / NPC Debug Panel
To use: key-press named userDebugKey (default = 24, which is the “O” key, as in “open”) while the crosshair is on a follower or an NPC
Description: Makes available these functions depending on whether the NPC targeted is a follower or not:
Switch the follower’s type between “normal” and “special”. See “Normal followers” and “Special followers” below for a description of both.
Force-recruit an NPC
Force-dismiss the follower
Teleport menu – useful to teleport stuck followers to you
Fix broken Outfit data
Fix stuck in Exclusive Topic
Force-recruit followers
Description: Mods that edit the base game’s recruitment quest (i.e. DialogueFavorGeneric Quest) will conflict with each other and only one version of this quest will be loaded by the game. Therefore, only Potential followers attached to the loaded quest will have the “Follow me. I need your help.” Dialogue Topic and will be recruitable. Potential followers from the other conflicting mods will not be recuitable. However, they may still be NPCs in the game. Force-recruit them to recruit then as a “normal” follower. See “Normal followers” below for a description of a “normal” follower. Force-recruited followers are dismissed like they are normal followers – i.e. with the Dialogue Menu.
Fix broken Outfit data
To use: key-press named userDebugKey (default = 24, which is the “O” key, as in “open”) while the crosshair is on a follower
Description: Dimissed followers (or any NPC) who have become “naked” were likely caused by a bug from a version before 0.814 of the mod. To fix this:
FISS is required for this feature.
Open the Follower Debug Panel on a follower.
Click on the “Fix Outfit data” button.
Create a new game. This tool will retrieve the correct Outfit data for the follower from this new game and automatically save it into a FISS data file.
Reload your save game. The tool will restore the correct Outfit data from the FISS data file.
Save your game.
Continue play.
Fix stuck in Exclusive Topic
These NPCs are those that should open their Dialogue Menu but do not. These NPCs are likely to have sufferred from speaking Topics that are “Exclusive”. As per the Creation Kit website: “…Once the NPC is marked as “in” the Exclusive Branch, he will act as if that branch is a valid Blocking branch (see above) until he says a line of dialogue from a different (non-Exclusive) branch. For example, if you exit dialogue and then speak to the NPC again, his greeting will be the Exclusive branch’s Starting Topic. This can result in blocking all dialogue if there is no topic in the Exclusive Branch that the NPC can speak…”
In previous versions, one of the Topic branches in the mod was Exclusive. This has been changed back to “Normal” that remedies the problem. However, affected followers would refuse any Dialogue.
This fix simply requires that you open the NPC Debug Panel while you have the NPC in the crosshair. And choose the menu item. They will complain as if they are hungry. This simply forces them to leave the previously Exclusive Topic. When you close the Dialogue Menu, their Dialogue Menu should open as normal.
More information
Normal followers
Normal followers are NPCs recruited into the DialogueFollower quest. The majority of potential followers and hirelings are recruited this way. This mod works by monitoring the Aliases in this quest. When an Alias is filled, the mod clears it and attaches the actor in a custom Quest that contains a list of 10 followers and 10 pets. The Global Variables, PlayerFollowerCount, PlayerAnimalCount and HasHireling, are set to 0 – allowing you to recruit more followers. When conversing with a current follower, the appropriate Alias in this uest is refilled so that the original Dialogue options, like for dismissals and trades, can work as normal.
Special followers
Required setting: userTeammatesAreFollowers = True (default)
Description: There are some followers (e.g. Serana, Cicero and Erandur) that do not follow with the default follower system described above. Instead, they are recruited by their specific behaviours as dictated by their Scripts. Some behaviours set their player’s teammate flag. Some other behvaiours add them to the CurrentFollowerFaction. You can have an additional 10 of these types of followers. And they can be dismissed with the appropraite dismiss Dialogue Menu item. Note that these followers are kept as “clean” as possible from the behaviours of this mod. The only effects this mod has on these followers are: (1) they are added to the CurrentFollowerFaction and their player’s teammate flag is set (whichever is required), (2) their default outfit is “nulled” at recruitment and restored at dismissal as per “normal” followers, (3) the trap avoidance AI. All other behaviours (e.g. as they follow you, when they automatically leave you, etc.) are dictated by their specific Scripts and AI Packages.
Configuring the mod
Method 1: SkyUI’s MCM
You can configure this mod with SkyUI’s MCM. Ignore the rest of this section.
OR Method 2: FISS
The SKSE plug-in, FISS, is required for this. With FISS installed, you can (1) export your settings from the MCM to the XML file, SKSE\\plugins\\FISS\\kuertee\\kuerteeSimpleMultipleFollowers.xml, (2) edit this file outside the game with a text editor, (3) then import it again for any save game.
Install
Use Wrye Bash or another mod manger to install this mod. Note that the package is only a normal ZIP file that follow the game’s default file structure. If you know the game’s mod file structure, install it manually.
Configure the mod as described in the “Configuring the mod” section.
Activate the mod.
Starting from a downloaded saved-game
(Thanks to Restutitor Orbis for this suggestion on how to jump-start my mods when playing from a downloaded saved game.)
“Starting another character from a DLed saved game file in Helgen, I came upon an easier solution than warping into the LAL prison cell.
If you have LAL but are starting a character in Helgen, just use a bat file with these 2 console commands or just type them in after the ~:
setstage arthlalstartquest10
setstage arthlalstartquest20This ends the LAL quest and re-enables the MQ101 update that you are supposed to get when you complete your escape, but was initially disabled by LAL.
That way you can do the vanilla MQ without switching to the LAL beginning if you want to.”
-Restutitor Orbis
Uninstall
If the mod has a hidden cell, go to to with by typing {COC kuSMFCell} (without the brackets) in the console and check any containers in it for any items left over by a bug, a failed code or a crash. Use Fast Travel to return to Skyrim.
In the console, type {SetPQV kuSMFQ uninstallNow True} (without the brackets). Or with Sky UI’s MCM, set the uninstallNow toggle to True then exit the menus.
Wait for a message confirming the uninstallation. Save the game.
Deactivate the mod in your mod manager. If you installed this manually, simply delete all the files you installed.
Copy the “kuSMFInterface.pex” file back into the “Skyrim\\Data\\Scripts” folder. The game will crash if you have other mods that use it. This file allows 3rd-party mods (even mine, e.g. Battle Fatigue and Injuries, Horse Commands, etc.) to use features in this mod. And this is an unfortunate step because there’s no method to protect the file from getting removed when uninstalling with a mod manager.
Troubleshooting
You can reset the mod by setting the resetNow toggle to True then exit the menus in the Troubleshooting section of the MCM.
When it resets it will ask you either reset all of its data or continue with the current data. Resetting all its data will remove all your settings and set the mod as if you have first installed it. Continuing with the current data will ensure that your current mod data is restored after the reset.
You can check all the mod’s data by typing {SQV kuSMFQ} in the console. You can check if your settings were set in the mod properly with this.
If you find that resetting and/or uninstalling do not work, the mod may have stalled. Read the “Creating a clean save” section below on methods on how to fix a stalled mod.
Creating a clean save:
The save file
There’s a misconception that “script mods” cannot be removed from a save. This is not true.
In regards to “script mods”, the save file contains not only the “full copy” of the script, but all “instances” of the scripts in your game.
The “full copy” of the script will always be in your save file – until the physical file of the script is removed from the Skyrim\Data\Scripts folder. When a save file is loaded, the Papyrus engine will recognise if the script has changed (e.g. when the physical file of the script was updated by the mod) and will post a warning to the log. The warning will state which portions of the script have changed and that the game will use the version in the save file. The engine will then run that old version in one iteration. Then will run the new version in subsequent iterations.
Script “instances” are multiple “copies” of the script that have been attached to different entites in the game. E.g. the data of the same script will differ between actors. These instances are not full copies of the script. Instead they are: script intervals and variables that are particular to the entity they’ve been attached.
Simply deactivating the mod’s ESP from the mod manager is not sufficient in creating a clean save. This is because the physical script files will still exist in the Skyrim folder. Although the game will not load the deactivated ESP, the Papyrus engine will still load the scripts from the save file. But because the ESP has been made invalid, Papyrus will (1) fail to inject the scripts variables into the game, and (2) fail to re-establish the scripts’ intervals. Papyrus will continually try to run the failed interval over and over again. An invalid script interval will cause problems.
Creating the clean save
To create a clean save, it is important not only to remove the “full copies” of all the mod’s scripts, but also to remove the intervals and variables of the scripts’ “instances”. The easiest way to do this is to (1) deactivate the mod, (2) remove all its files from the Skyrim folder, (3) load a save file, then (4) save.
Every time a save file is loaded, the Papyrus engine will detect and tag scripts that have been made invalid by the removal of the scripts’ physical files from Skyrim folder. Scripts that have been tagged as invalid will be ignored. All their copies, intervals and variables will be dropped and will not be included in the next save.
Note that although the scripts have been cleaned from your save game, their non-script effects (e.g. Magic Effects) may not have been removed. This is a normal problem in any mod – not only “script mods”. It is up to the author of the mod to provide a method to remove these non-script effects from the game. And the removal of these effects need to happen BEFORE the mod is uninstalled. Otherwise, if the mod has been uninstalled before removing it’s non-script effects, not only would the control to activate this removal be inaccessible, but the scripts that run this removal would be invalid.
For my mods, I provide the “uninstallNow” button in the Troubleshooting section of the mod’s MCM. Clicking on this will remove all non-script effects from all affected entities. Also, it will stop any script intervals in-game (i.e. so that Papyrus doesn’t need to tag them as invalid in your next load).
If the mod has completely stalled and the “uninstallNow” button is inaccessible, my mods have an extra precaution of disabling all Magic Effects automatically if the ESP is not loaded. All the Magic Effects of all my mods are only active if a Global Variable located in the mod’s ESP exists. If the mod’s ESP is not loaded, that Global Variable is not loaded. This causes all Magic Effects to be dispelled.
Note that although invalid scripts and its intervals and variables are not loaded into the game, they will still exist in your save file as NULL (or zero) entries. To remove these zeroed spaces from your save file will require the “Save Game Script Cleaner” tool – or something similar. This tool can find these zeroed spaces and remove them, producing a true “clean save”.
Summary
Below are a set of steps you can follow that produces a clean save, as described above.
If you can, uninstall the mod by clicking on the “uninstallNow” button in the Troubleshooting section of the the MCM. Or from the console by typing {SetPQV kuHCbQ uninstallNow True} – without the curly brackets.
Wait for the mod to confirm the uninstallation. It may take a minute. If no confirmation appears, then simply continue to the next step.
Save the game manually from the console by typing {save uninstalledMod} – without the curly brackets.
Exit the game and uninstall all the mod’s files (*.ESP, *.PSC, *.PEX) from the game folders. Make sure that none of the mod’s Scripts are left. This is the reason a mod manager is essential. Mod managers can easily uninstall all files that it had installed. I use “Wrye Smash” as my mod manager. My next recommendation is the “Nexus Mod Manager”.
Load the “uninstalledMod” save file.
Save the game manually again from the console by typing {save cleanSave} – without the curly brackets. Because all of the mod’s files were removed, all of its data will be “zeroed” in this save file.
Use these features (listed below) of the “Save Game Script Cleaner” to remove the “zeroed” data physically from your save file:
1. Open the “cleanSave” file
2. Fix script instances
3. Delete all #
4. Clean other
5. Del. broken actives
6. Save the file with “Save as”
Play from this new save file.
Script logging
As a last resort, you can enable script logging and investigate the “Documents\\My Games\\Skyrim\\Logs\\Script\\Papyrus.0.log” and/or “Documents\\My Games\\Skyrim\\Logs\\Script\\kuSMF*.log” files. Or send them to me. Contact me first either on TESNexus or the official Bethesda forums.
To enable script logging, set bEnableLogging, bEnableTrace and bLoadDebugInformation in the Skyrim.INI file. More information about this is described in this thread in the official Bethesda Creation Kit Forum.
Also, you can set mod specific logging by setting debugMode to 10 in either the MCM or in the console by typing {SetPQV kuSMFQ debugMode 10} (without the brackets). Mod specific logs are found in “Documents\\My Games\\Skyrim\\Logs\\Script\\User\\kuSMF*.log”.
Play the game for 5 minutes or so – enough time for the game to capture logging events.
If the “Papyrus.0.log” contain “Suspended stack count is over our warning threshold, dumping stacks:”, then your game is suffering very badly. I’ve written a guide on how to clean your game and recover from this problem in Bethesda’s official forums.
Feel free to send me (kuertee at gmail dot com) the “Documents\\My Games\\Skyrim\\Logs\\Script\\Papyrus.0.log”, “Documents\\My Games\\Skyrim\\Logs\\Script\\User\\kuSMF*.log” to investigate the problem.
Localisations/Translations
Apart from the displaying English text contained in the Message Forms in the Creation Kit, the mod also both constructs sentences dynamically or inserts English words dynamically from the Papyrus Scripts. To make it easier for translators, I’ve written all these texts into one Papyrus Script, kuSMFLocalisationS.PSC. To fully translate SMF into another language, apart from translating only the Message Forms in the Creation Kit, you’ll also need to open and compile this Script either via the Creation Kit or your preferred external editor.
Translating Message Forms in the game
Here’s my recommended steps for translating this mod:
Move the Scripts from “Data\\Scripts\\Source\\kuerteeSimpleMultipleFollowers” to “Data\\Scripts\\Source”.
Open the mod in the Creation Kit.
Open the “kuSMFLocalisationS.PSC” Script by:
1. Open the kuSMFQ quest.
2. Click the Scripts tab.
3. Right-click on the kuSMFLocalisationS.PSC.
4. Select “Edit” or “Open in External Editor”. I recommend opening it in an external editor so that you can quickly switch between that window and the Creation Kit’s window. PSC files are simple text files, so any text editor will open it.
Return to the Creation Kit and translate as many of the Message Forms that you can.
When you see a Text Replacement variable in the form, look for the word (or more likely words) that will be used as replacements in the kuSMFLocalisationS.PSC file. Examples:
For the “kuSMFBestSkillAlteration” Message Form, the “<Alias=bestSkill0>” variable will be replaced by English words listed under the note “these texts are used in these Message forms: kuSMFBestSkillAlteration, kuSMFBestSkillConjuration, …” In regards to these examples, the words that will be used as replacements are Skill names like “One-handed melee weapons”.
For the “kuSMFFollowerEASMessage” Message Form, the “”<Alias=bestSkillArmourPreference>” variable will be replaced by the English sentences under the note “these texts are used in this Message form: kuSMFFollowerEASMessage.” For this specific example, the sentence that will be used as a replacement is “I am hungry.”
Note that the name of the variable (e.g. bestSkillArmourPreference) is NOT indicative of their content as used in the the Message Form. For example, you’ll sometimes find that the variable named “bestSkillArmourPreference” should actually contain the follower’s name and not their armour preference. You’ll need to read the Message to help you determine the context the variable is used. Do not assume that “bestSkillArmourPreference” would contain “Light” or “Heavy” armour descriptions in any of the Message Forms. You’ll need to read the Message Form to see the context the variable is used.
It is important to not introduce errors in the “kuSMFLocalisationS.PSC” file. Be careful in adding quotes or single-quotes to your translations. I suggest to avoid adding them and only change text that are INSIDE the double-quotes.
Save the changes you’ve made in “kuSMFLocalisationS.PSC”.
Compile the “kuSMFLocalisationS.PSC” Script:
1. Open the kuSMFQ quest.
2. Click the Scripts tab.
3. Right-click on the kuSMFLocalisationS.PSC.
4. Select “Edit”. The script should open in the Creation Kit’s Script editing window.
5. Click on the “Build” menu, then select “Compile”.
6. Note of ANY errors that is reported.
7. If the Script won’t compile, it may be best to restore it from the ZIP package and start again.
An actual translation exercise example is described below. Apologies for the poor Spanish translation. I used Google Translate for it.
1. For the sentence: “Lydia doesn’t know how to traverse a nearby BEAR TRAP. Jump over it.” that can be found in the “kuSMFTrapsNoExitAnglesMsg” Message Form.
2. In Spanish, according to Google Translate, this is: “Lydia no sabe como recorrer una trampa para osos en las inmediaciones. Saltar por encima de ella.”
3. This is the text in the Message Form: “<Alias=bestSkill1> doesn’t know how to traverse a nearby <Alias=bestSkill0>. Jump Over it.” Note that the “bestSkills1” variable actually contains Lydia’s name and not the name of a Skill. And the “bestSkill0” variable contains the trap’s name.
4. I would translate this Message Form to contain this text: “<Alias=bestSkill1> no sabe como recorrer una <Alias=bestSkill0> en las inmediaciones. Saltar por encima de ella.”
5. Then I would go into kuSMFLocalisationS.PSC, and change the appropriate lines like this
If textKey == “bear trap”
text = “bear trap”
INTO
If textKey == “bear trap”
text = “trampa para osos”
6. I save the changes, then compile the Script.
7. In the Spanish version of game, when Lydia comes across a bear trap that you’ve not yet jumped over, this message should pop-up in the top-left hand corner of the screen: “Lydia no sabe como recorrer una trampa para osos en las inmediaciones. Saltar por encima de ella.”
Translating the MCMM
Translating the MCM also requires that you edit a Script file. You’ll need to edit the “kuSMFxMCMQS.PSC” file. Again, I suggest that you change only the text inside the double-quotes. Do not remove nor add any double-quotes.
Open the “kuSMFxMCMQS.PSC” in the Creation Kit or in an external editor. The “kuSMFxMCMQS.PSC” Script is attached to the quest “kuSMFxMCMQ” in the “kuerteeSimpleMultipleFollowers MCM.ESP” file. Or when translating the merged version, the “kuSMFxMCMQS.PSC” Script is attached to the “kuSMFxMCMQ” in the “kuerteeSimpleMultipleFollowers.ESP” file.
Translate all the text in the “Debug.MessageBox” functions. Simply search for “Debug.MessageBox” and translate the text inside the double-quotes in these lines.
Translate all the text in the “ShowMessage” functions. Simply search for “ShowMessage” and translate the text inside the double-quotes in these lines.
Translate all the text inside the double-quotes in the section “OnPageReset” section. Search for “event OnPageReset” to quickly go to that section.
Translate all the text inside the double-quotes in the section “creatOptionsOrSetModVariable” section. Search for “Function creatOptionsOrSetModVariable” to quickly go to that section.
Compile the script.
Credits
kuertee
vidalia for ignore friendly hits feature and beta testing
Licensing/Legal
You can do whatever you want with this mod but all I ask in return is that you give me credit. I would also like to be contacted when you include this mod in part or in full in a public release.